Country Living & Homesteading e-zine #19:
Straw Bale Gardens, Growing Garlic, Spring Bulbs, Chicken Problems
ISSUE 19
MARCH, 2010
This Month's Quote:
"The greatest pleasure in life is doing what people say you cannot do"
~ Walter Bagehot
Country Living e-zine Editorial :
March is nearly over, and for those of you just coming out of winter, and what a winter it was!, you will be thinking about planting spring bulbs. See our article on spring bulbs as it has a number of tips that you may find useful.
It was lovely to hear from one of our e-zine readers this month. She wrote and said how much she enjoyed the newsletter and that she looked forward to reading the articles. What a moment that was! In nearly 2 years of writing this newsletter, she was the first. Let's hope she won't be the last!
Please don't be strangers. I am always interested in what you like or don't like reading, and what you would like to see in the newsletters that we haven't published yet. So feel free to drop me a line. Hearing from you just confirms that I am not writing in a vacuum!
We are still waiting to hear from you on what you thought of the seed and plant exchange idea. You still have time to respond through the Farm Forum. So pop in and tell us your views on this subject.
If you missed Gypsy's Homestead Forum entry this month you can go there by clicking on the link. She made some interesting comments about drugs in commercial chicken food, and why it is best to make your own. Homestead Spring Time
Anyway, happy reading, hope you find something of interest, and pop back often to see what other information we have placed on the website since your last visit.
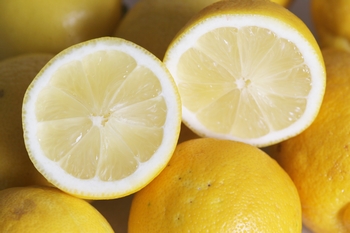
Quick Tips for Lemons
- Lemons will keep quite well on a tree. Therefore only pick enough lemons as you need.
- If you have a glut of lemons, squeeze them, and place the juice in ice-cube trays. Remove them when they have frozen up and place in zip-lock bags for later use. They will keep for months like this.
- Mix lemon juice with olive oil, salt and pepper for a simple salad dressing.
- Quarter lemons and serve with fish, seafood, chicken and BBQs.
- Add grated lemon rind into stuffings for roasts.
- Squeeze the juice of a lemon into a glass of water for a refreshing drink.
- Boil rice for 4 in a pot of chicken stock using 2 stock cubes. Squeeze in the juice of half a lemon and grate the rind. Add to the rice while cooking. Great with chicken.
Article 1) Make a Straw Bale Garden
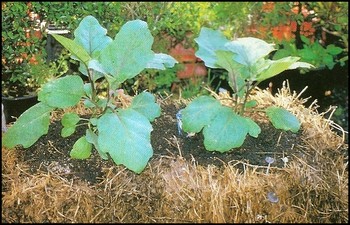
Straw bales have lots of uses, other than the usual ones. We can use them for cheap seats, we can use them to decorate our farm shops, use the straw to build scarecrows and even houses, and we can also use them to grow vegetables in!
Imagine a garden that is simple to make, requires less bending, doesn't involve heavy digging, or wedding, or even much watering. Have you ever wanted to have a vegetable garden but you didn't have any soil, or you live in a place where space is limited? Straw bale gardens can be the answer to all of these, and more!
What you need:
Well, the basics, of course is that you need some straw bales. The best type to get is lucerne or soya bean nut. However, pasture hay, straw and sugar cane mulch is just as suitable. You will also make sure that you have a good soil mix. We suggest you mix your own using bags of compost, along with some chicken manure, and a handful of dolomite and blood and bone.
Certain vegetables do a lot better being grown like this. Those that are more successful are seedlings like tomatoes, green, red and yellow capsicums, eggplants, lettuce, cucumber, basil, parsley, mint, spinach, beetroot, turnips, etc.
How to Plant you Straw Bale Garden:
Just like growing vegetables conventionally, where you position your bales must be where your vegetables will be getting at least 6 hours of sun a day. Place them on the ground so that the string is around the sides, rather than the top. Now, taking a thick stick (a sawn-off broom handle is perfect for this), jam the stick into the bale and move it about until you have a hole that would accommodate the size of a man's fist.
Each bale should be able to hold 8 such holes. If you are planting lettuces 8 holes is fine, if you are planting tomatoes, then you will need to reduce the number of holes to give your plants space to grow.
There are some fundamental permaculture principles that are worth noting, so that perhaps you might think of converting your garden into something more sustainable.
Fill up the holes with your compost mix and sprinkle a handful of chicken pellets over the entire surface of the bale. On top of that sprinkle a handful of dolomite, followed by a final layer of compost to a depth of 10 cm. Now water well using a gentle spray, soaking the straw and soil without washing the soil away. You could also finish off with a good soaking of a seaweed liquid manure.
To avoid burning your seedlings, hold off from planting them until the following week. This will allow your bale to settle and for the fertilizers to be absorbed into the bale. The following week, plant your seedlings into the deep holes that you created originally. Bury the seedling a little deeper than you would normally do, to allow for shrinkage of the bale which will occur as it breaks down over time. Water in well, feed with some seaweed manure and stake any plants like tomatoes.
Keep the plants moist and feed once a week, to every 10 days with a solution of seaweed liquid manure to keep your plants healthy. You can add a tablespoon of dolomite to the bales every alternate week to keep the compost sweet.
Another way to use your straw bales is to use them as a frame-work for a no-dig garden. And build your garden in the same way using layers of newspaper etc. as per the instructions I gave you.
At the end of the growing season, take your bales, dismantle them and add them to the compost heap of use as a mulch for your garden beds.
Article 2) Growing Garlic

Garlic is one of those herbs you either love or hate to eat. And in the case of my mother, she loves it, but is totally allergic to it due to the sulfur content. As she is also allergic to sulfur drugs, there are no surprises there. I, on the other hand love garlic. Not only does it have wonderful medicinal qualities but it is also easy to grow, and adds taste to the Italian recipes I love to prepare.
Garlic is also one of those herbs that will be your friend in the garlic for companion planting and makes a great friend if planted with roses. It is also a useful plant for natural pesticides and insecticides.
Garlic is one of those herbs that you can recycle when you have been shopping at the store. When you keep garlic for too long it starts to sprout. Instead of throwing it away, this time just plant it!
When to Plant:
As a bulb garlic likes a cool, rainy autumn and a rainy frosty winter to do really well. It also likes to have a warm to hot spring and summer to do really well. If you live in such a climate you will have no trouble growing garlic at all. If you live in the tropics you will not be successful as the garlic needs the cold winter period to form good cloves.
If you want to plant garlic that you purchased from your store make sure that it has begun to sprout first before you plant it. I say this because some commercially grown garlic has been treated so that it won't sprout. If this is the case, then you will either have to buy some at your local farm store, or find some bulbs from a commercial seller off the Internet. When planting your garlic the shoot will be pointing upwards in the soil.
You can plant the cloves in late autumn either whole if the bulb is a single bulb variety, or separated if it is from the multi-bulb variety. Plant to a depth of about 8 cm deep in good free-draining soil that is in full sun. Your soil should have a lot of organic matter added to it, and soft enough for the bulbs to grow well, and reach their full potential. Each glove should be planted about 10 cm apart.
Growing Conditions:
Water in but don't over-water them as they will rot. If you get a lot of rain, only water during the dry spells.
During its growth make sure that you feed your plants with a liquid manure on a regular basis to boost your plants.
When to Harvest:
Harvesting can begin after 8 or 9 months of planting.
Towards the end of summer the garlic leaves will start to turn yellow. Reduce your watering as soon as you see this. Wait for the leaves to die back, although not completely. Harvest when there are about 4 or 5 green leaves still on the plant. Pull up the bulbs and dry them out by hanging them in the sun for about two weeks. Make sure that they do not get rained on while you are drying them. Your garlic can be stored for up to seven months.
Remember to keep some bulbs back for yourself so that you can plant them again the following season.
Spring Bulbs
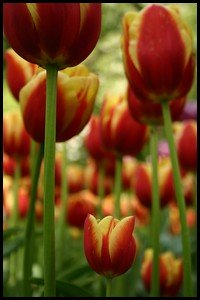
Spring can be a wonderful time after the cold depths of winter. It is the time for renewed hope, spring lambs and spring bulbs. Nowadays there are so many wonderful bulbs to choose from that making a choice can be really overwhelming. By planning your spring garden, you can make better choices and have a more successful display.
The first thing to do is to look at your garden and decide where it is you want to plant your bulbs. Identify which areas need a splash of colour and decide on some sort of colour scheme for these areas. Make sure that the colours of you new bulbs won't clash with your existing plants and colour schemes and what will be flowering at the same time as your new bulbs.
Bulbs were meant to be planted en-mass. Never plant individual bulbs as they will just look silly and out of place. In nature they bloom in vast swathes, and that is what you want to copy. You can never have too many bulbs in an area, and they are also cheaper when buying in bulk.
Traditionally when we think of bulbs we think of daffodils, tulips, bluebells etc. for cold climates. However, for those of you who live in warmer climates you can also plant bulbs but just not the ones mentioned. You can plant bulbs such as babiana, sparaxis, freesias, ranunculus and Spanish bluebells which are native to warmer climates.
If your winter hasn't been as cold as you thought it should have been you can store bulbs such as tulips, daffodils, jonquils, Dutch irises, hyacinths, grape hyacinths and bluebells and place them in an air-tight plastic container in your vegetable drawer for 6 weeks prior to planting.
Where to Plant:
Bulbs like a place where they will get full sun. Plant in free-draining soil as your bulbs will rot if they are constantly standing with their feet in water.
How to Plant:
As a rule of thumb you usually plant bulbs 3 times the depth of the bulb's width. Position the bulb with the point facing upwards, except ranunculus and anemones which should be planted with the pointy end down. They like soil that has lots of added compost.
Before you plant them it is a wise idea to lay them on top of the prepared soil first. This allows you to see the spacings of the bulbs and the desired shape in which they will grow. This is especially important where you want to create an effect of 2 or more bands of colours flowing into one another.
Growing Conditions:
Water your bulbs wisely. If the rains are falling then you don't need to water your bulbs. However, if there is a dry spot you will need to water them once in a while, until the bulbs start to shoot. After that, water only 2-3 times a week to make sure that the bulbs are getting enough water to flower.
Apply liquid manure to your bulbs before and after flowering. This gives your bulbs the boost they need to flower well, and to also feed the bulbs and prepare them for the following season.
After they have flowered and the season has ended let the bulbs die back naturally. This allows the bulbs to draw food from the leaves and the energy they will need to bloom for you next spring.
Many people like to dig the bulbs up after they have flowered and store them in a cool, dark airy place until they need them again. Others, like myself, like to leave them in the ground so that they are left to their own devices, multiply and produce a more spectacular show each subsequent year. You can only do this in areas where you won't need to dig during other times of the year.
Recipe for the Month: Homemade Lemonade

1 cup caster sugar
1 cup water
1 cup strained lemon juice
mint
ice
Combine the sugar and the water in a small pot and stir without boiling until the sugar dissolves.
Cool this sugar syrup and combine with the lemon juice.
Keep this in the fridge as your cordial base.
To serve; mix 1 part cordial base to 4 parts water. Pour into serving glasses over ice and decorate with some mint.
Well, we hope that you have enjoyed reading the latest issue of our e-zine, as much as we had fun writing it. We also hope that you will stay with us for a long time, visit our web site for updates, and feel free to contribute to the many forums we have created especially for you.
Until next time!
Philip & Kathryn Bax
Country Living and Farm Lifestyles
https://www.countryfarm-lifestyles.com
Your Gateway to Rural Dreams! Visit us for Country Crafts, Country Decor, Country Cottages, Farm Shops, Farming & Gardening Articles and general issues dealing with Rural & Country Life.
New! CommentsDo you have something of value to add? Leave me a comment in the box below.
|


