Growing Garlic Tips on How to Grow Garlic Successfully - Every time!
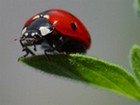
It is your friend in the garden when you use it for companion planting. It makes a great friend if planted with roses. It is also a useful plant for using as a natural pesticide and insecticide.
Garlic is also one of those herbs that you can also recycle when you have been shopping at the store. When you keep garlic for too long it the garlic cloves start to sprout. Instead of throwing it away, this time just plant it! Now you know that you have a viable plant that will develop proper bulbs. It is that easy to grow!
However, there are a number of garlic varieties that you should know about if you want to grow it.
Garlic Varieties
Hard-neck Garlic and Soft-neck Garlic
- Hard-neck Garlic
- Soft-neck Garlic
Hardneck garlic, although more labor intensive, is far more rewarding in that it gives you large bulbs that are very different in flavor. For those of you living in a cooler climate, then growing hard-neck garlic is for you.
Why is it more labor-intensive? Well, you will have to plant all your garlic cloves by hand for a start, making sure that you are planting the clove with the pointed side up.
Secondly, you will have to remove the flower stalks called scapes, before you harvest. This is better done at the last minute, resulting in better formed bulbs, and even larger bulbs than if you had to remove the flower stalks too early in their development.
Elephant Garlic
The elephant garlic is closer to the leek family to that of the garlic family and has a milder taste. In fact elephant garlic is so mild that you can use it raw in salads or you can use it as a substitute for onions.
If you plant elephant garlic it will produce single bulbs in the first year and in the second year it will produce the large cloves for which it is known. You can use these cloves to replant and grow more plants.
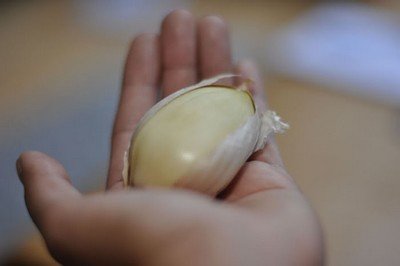
This gives you some idea of the size of an elephant garlic clove!

Growing Garlic from Seed or Bulbs
As a result the best way to grow garlic is only from cloves or bulbs. I have been successful in growing garlic from shop-bought garlic, however, I only plant the cloves out once I see them sprouting. Often your store-bought garlic has been treated not to sprout, and so if you don't wait to see what sort of garlic you have you will be disappointed because nothing will come up.
If you are growing garlic for profit or on a larger scale, then you will need to go to a seed supplier and buy your bulbs directly from them.
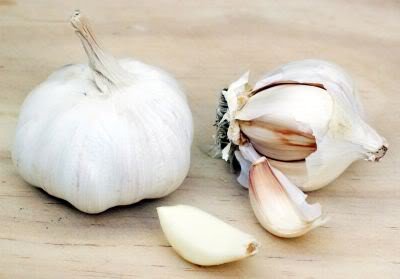
Cracking the garlic
Do this with care as you don't want to damage the bottom of the clove from where your plants' root system will develop. Only crack the bulbs 24 hours before planting. If you do this more than 24 hours in advance the ends of your garlic cloves will dry out and spoil the chances of developing a good root system.
Once you have cracked all bulbs it is time to plant. Make sure that you plant each garlic clove pointed-side up, and 2 inches below the soil line. Space at 4-8 inches. If you pack your bulbs any closer than this the less chance they have of developing large bulbs, and this is not what you want.
Growing Garlic from Bulbils
 If you are growing hard-neck
garlic you will have flower stalks
appearing on your garlic plants. These are also known as top-sets
or scapes.
Many people just cut these off before harvest. However, if you wish to
propagate your garlic plants you can leave these flower stalks to
mature into bulbils and then harvest the
fruit from here for replanting.
If you are growing hard-neck
garlic you will have flower stalks
appearing on your garlic plants. These are also known as top-sets
or scapes.
Many people just cut these off before harvest. However, if you wish to
propagate your garlic plants you can leave these flower stalks to
mature into bulbils and then harvest the
fruit from here for replanting.The bulbs that you harvest from these flowers are just as good as those of the parent plant. This is a cheap and effective way in which to increase your planting stock, however, the downside is that it takes 2-3 years before the fruit from the bulbils will grow into good sized garlic bulbs.
In addition to this, you will still need to plant and harvest your bulbs every year, just like any other garlic planting process and with each succesive planting for those 2 - 3 years, the bulbs will get bigger.
Usually, the bulbils are planted out in the spring. However, if you are worried about the bulbils spoiling over the winter, you can plant them out in the fall, but you may lose a couple to rats and moles looking for something delicious to feast on when times are lean.
In the first year the plants from the bulbils will not grow scapes or top-sets. The will also have very shallow roots which means that they need to be kept well-watered. If they have even one day of no water they will stop growing.
Because the bulbs of the first plants will be small it is better to harvest them before the leaves have died down, just so that it is easier to find them.
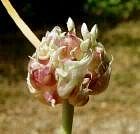
How to Harvest the Garlic Bulbs from the Bulbils
Wait until the bulbil has ripened enough so that it has burst open and looks as if the bulbs are about to fall to the ground. Snip the heads off very carefully including a long stalk. Tie the stalks together in bunches and hang upside down to dry. Once dried out, cut off the heads and store in brown paper bags and leave in a dark place until you are ready to plant them out.Growing Garlic: When to Plant
Growing garlic in a Garden Bed
However, there are some
varieties of
garlic that you can grow in warmer and even tropical climates. Garlic
from the Artichoke group are among the best for regions with warm
winters and springs. Cultivars from the Creole group also do well in
warmer areas, but their bulbs are generally smaller.
If you want to plant garlic that you purchased from your store make sure that it has begun to sprout first before you plant it. I say this because some commercially grown garlic has been treated so that it won't sprout. If this is the case, then you will either have to buy some at your local farm store, or find some bulbs from a commercial seller.
You can plant the cloves in late autumn either whole if the bulb is a single bulb variety, or separated if it is from the multi-bulb variety.
As already mentioned, plant to a depth
of about 2 inches deep in
good free-draining soil that is in full sun.
Your soil should have a
lot of organic matter added to it as garlic grows better in rich soil,
and soft enough for the bulbs to grow well, and reach their full
potential.
| Countryfarm Lifestyles Gardening Tip: There is a sound saying that garlic should be planted on the shortest day and harvested on the longest. Garlic, in general needs a cold period, preferably a sharp frost or two, for it to grow vigorously. In fact you don't have to wait until 21st December to plant your cloves; any time from mid-fall is fine. |
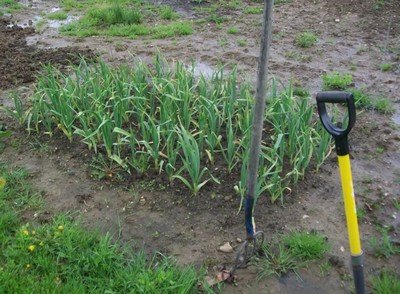
Growing Garlic: Growing Conditions
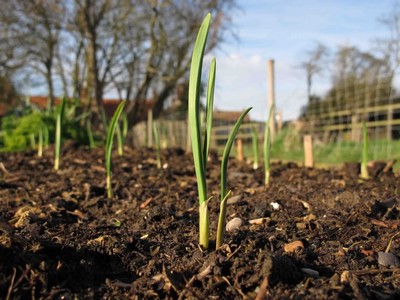
Emerging garlic plants from the soil
Water in but don't over-water them as they will rot. If you get a lot of rain, only water during the dry spells.
During its growth make sure that you feed your plants with a liquid manure on a regular basis to boost your plants.
Growing Garlic in Containers
It is possible to grow garlic in containers as long as you have enough soil depth for the plant to grow comfortably. Make sure that you have also prepared the soil well enough to receive your plants and that there are enough drainage holes at the bottom of the container to allow the water to drain away.
If you don't have enough drainage holes in your containers your soil will turn sour and your bulbs will eventually rot.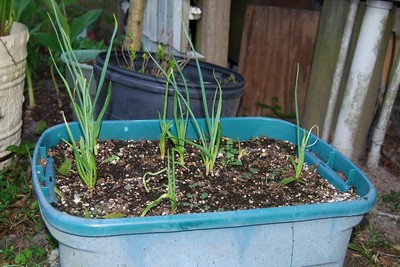
Growing garlic in plastic containers
Growing Garlic: When to Harvest
 You
can start
harvesting garlic after 8 or 9
months of planting.
You
can start
harvesting garlic after 8 or 9
months of planting.
Towards the end of summer the garlic leaves will start to turn yellow. Reduce your watering as soon as you see this.
Wait for the leaves to die back, although not completely. Harvest when there are about 4 or 5 green leaves still on the plant.
Pull up the bulbs very gently as they bruise very easily. One way of getting them out is to take the soil away from the sides of them with a spade. Never fork them out, as you will end up putting the fork through them.
Drying your Garlic
Once out of the soil, you will need to dry or cure your garlic bulbs. This means drying them out by hanging them in the sun for about two weeks.
Just remove as much of the soil from them as possible with your hands, not water, and keep them away from any moisture. Make sure that they do not get rained on while you are drying them and that they also have plenty of circulation.
Your garlic can be stored for up to seven months. Hanging them up in mesh bags ensures that there is good air circulation.
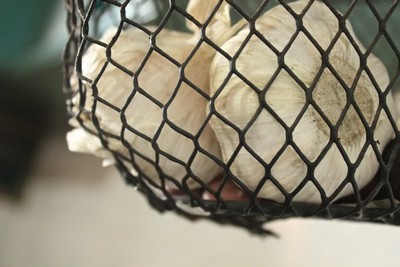
Storing garlic in mesh bags is for good circulation
Remember that when you are growing garlic during one season that you need to keep some bulbs back for yourself so that you can plant them again the following season.
Choose only the best bulbs for this. They should be large and unblemished.
Growing garlic is not only a great health herb for lowering cholesterol but it is also a herb used in many dishes today, especially in Italian Recipes.
Did you find this page helpful?
Sharing is a way of saying, "Thanks!"
Follow Us and Keep Up to Date
Other Resources you May be Interested in
Go from Growing Garlic back to Growing VegetablesGo to Growing Herbs Indoors
Go to Growing Herbs
Go to Growing Vegetables in Containers
Go to Raised Bed Garden
Go to Square Foot Gardening
Do you want to Leave a Comment on Growing Garlic?
We have lots of pages where you can contribute to throughout this homesteading website. We love hearing from our readers, and hope you will be one of those we hear from too. Do you have any more information on growing garlic that you would like to share?Leave a Comment
Do you have anything that you would like to add after reading this page? We would love to hear your thoughts. If you can add additional information to what has been written here you will be adding value to the website! No need to have any special skills - just type and submit. We will do the rest!
Don't miss out on our latest news and articles. Sign up for our free monthly e-zine!
NAVIGATION COLUMN
Find us on Google+Country Shopping
Country StoreFree Stuff
Free MagazinesHomesteading Blogs
Country Living Blog Gypsy's WanderingsCountry Living
Country Home Country Living Country Crafts Country HolidaysCountry Real EstateCraft ForumPicnics CampingSelf-Sufficiency
Self-Sufficient Living Organic Gardening Do It Yourself Easy RecipesHomesteading
Homesteading Today Homesteading Q & A Homestead Animals Urban Homesteading Homestead DirectoryGoing Green
Green LivingFarms Around the World
South Africa United Kingdom United States Canada Central America Australia New Zealand Europe Farm Photos Farming Articles True Farming Stories Farms for Sale Organic Farm ProduceMiscellaneous
Guest Book Search Site Survey Advertise with Us


OTHER SECTIONS OF INTEREST
 Natural
Pesticides
Natural
Pesticides Companion
Planting
Companion
Planting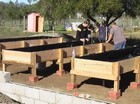 Raised
Bed Gardening
Raised
Bed Gardening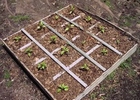 Square
Foot Gardening
Square
Foot Gardening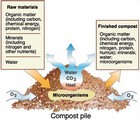 How to
Make Compost
How to
Make Compost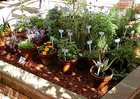
Growing Herbs
New! Comments
Do you have something of value to add? Leave me a comment in the box below.