How to Patchwork with Easy Techniques, Instructions, Designs and Free Patterns
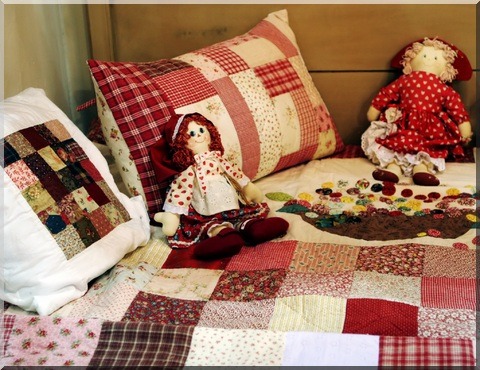
Picture courtesy of
Ginaellen of Dreamstime.com
INTRODUCTION ON HOW TO PATCHWORK
Learning how to patchwork is no different to how it was learned back in the 1800s when patchwork first came into vogue. And the basic tools have remained the same; needles, thread, pins, fabric, templates and a pair of scissors.
Today there are lots of craft shops who offer patchwork lessons, or you might even think of taking a patchwork holiday. There are lots of places on the Internet offering patchwork holidays. Two very good ones are those found in Scotland and France.
HOW TO PATCHWORK AND USING THE RIGHT NEEDLES
Needles for hand-sewing should be short and fine, known as "betweeners" as these needles slip into and out of the fabric with ease. If you are a total beginner you will probably want to start with No.8 needles, as these are more manageable when first starting out.However, as you get more practice and become more proficient, you can then use No. 10 needles which will allow you to make even smaller stitches. If you are going to use your sewing machine for quilting, then the size of the needles you will use will be determined by the thickness of the material.
HOW TO PATCHWORK AND USING THE RIGHT THREAD
Thread used should be quilter's thread which comes in all sorts of different colors. This type of thread is stronger than ordinary thread and it is less likely to break or knot. However, it is best to use synthetic thread with synthetic fabrics, and 100% cotton thread, or a cotton-polyester thread with cotton fabrics.You can also run your normal machine thread through beeswax, which you will find in your local craft shop, to strengthen the thread and prevent it from knotting.
Select a color that matches the darkest fabric that you are using. If your patchwork project has a number of different colored fabrics, use a neutral thread that will blend in with all the fabrics of your project. Such colors that work successfully here are ecru or gray. However, you will be the best judge here for what will match.
HOW TO PATCHWORK AND USING THE RIGHT PINS
When pinning your work never use stationery as they are too blunt, nor should your use rusty pins, as they will mark your fabric. Use dressmaker's pins that often have glass-heads as they are sharp and easily pierce through layers of fabric.HOW TO PATCHWORK USING A QUARTER SEAMER
The quarter seamer is an ideal tool to help you rule your seams accurately and quickly. It is usually made of perspex and is a quarter of an inch wide on all four sides.HOW TO PATCHWORK USING A CLEAR RULER
You will need a clear, plastic ruler. This is a great little gadget as there is no chance of shaving off a piece of the ruler when you are cutting through layers of fabric. Make sure that it is well marked, and ideally it has both imperial and metric measurements, as they are still both used in patchwork.HOW TO PATCHWORK USING FRAMES AND HOOPS
Hoops or quilting frames should be used to contain your fabric, which then makes it easier to get those stitches as neat as you would like. Both of course have their advantages. The hoop is ideal for pieces that are small and can be transported from place to place. Larger projects such as bedspreads will need a quilting frame. This then limits where one can quilt and is not that easy to take from place to place.HOW TO PATCHWORK AND CHOOSING THE RIGHT FABRIC
When you start your project you will be tempted to buy all sorts of patchwork fabrics. However, you should choose your fabrics wisely as wool, stretch-fabrics, open-weave and crepe fabrics are really not suitable for patchwork. And where silk will give you a luxuriant finish, it slips a lot when you work with it, and makes it a difficult fabric to use as a novice. Whatever you choose, you should make sure that the different pieces of fabric are of all a similar weight.Medium-weight 100% pure cotton fabrics are the simplest to start off with. Avoid those fabrics which are lightweight and heavyweight fabrics such as velvet and curtaining, as again they are more difficult to work with. However, cotton has a tendency to fray, and this is something you must be aware of when sewing your projects.
All fabric must be washed beforehand to pre-shrink and also to make sure that there is no bleeding of dyes in the fabrics you have chosen. When you wash your fabric choose a mild detergent and avoid conditioners. When washing your fabrics wash the lighter fabrics separate from the darker colors.
COUNTRYFARM LIFESTYLES TIP - If you have a problem with any of your colors bleeding, then try adding either vinegar or salt to your final rinsing water to fix the dye. Re-wash to see if this has sorted out the problem. If us doesn't, don't use it, rather find an alternative.
HOW TO PATCHWORK USING TEMPLATES
When you see a patchwork template there will be 2 lots of lines. One line will be made up of dashes, and the other line will be a solid line. These lines show both the stitching and cutting lines respectively. However, there are times when you will find that a template will only have a solid line, indicating where to cut. You will have to add a seam allowance to these templates, 6mm is the normal allowance.
HOW TO PATCHWORK AND CUTTING YOUR FABRIC
Use a fine, sharp pencil to mark your fabric on the wrong side. A lead or pale colored pencil works well, with silver and white showing on dark fabrics. When you cut your fabric use either a very sharp pair of scissors, or use a rotary cutter and board. Rotary cutters are excellent for cutting strips, straightening fabric edges and even cutting out various geometric pieces. It also makes for more accuracy when you are cutting out several layers of fabric at a time.Always cut your material on a mat, as these blades are very sharp and your husband will not be amused if you carve up the dining-room table in the interim! These mats have been made to ensure that your blade stays sharp and the mat also helps to grip the fabric whilst cutting. If you can find a 'self-healing' cutting mat, these are the best to work with.
A smaller pair of scissors is ideal when you want to trim threads, clip points or seam allowances.
Cut your squares and rectangles out on the straight grain. Right angle triangles should have the right angle on the straight grain, while other triangles and irregular shapes should have the straight grain running through their centers.

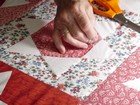
HOW TO PATCHWORK AND PIECING YOUR FABRICS
After you have carefully cut out your fabric shapes, it is time to start piecing them together. This can either be done with hand-sewing or by machine, and in no time at all you will have a patchwork quilt!Now there are 2 different patchwork techniques that can be used; the English Method, or the American Method.
The English method can be time-consuming, but you end up with a very professional looking final product. How this is achieved is by tacking the fabric pieces directly onto soft cardboard template shapes before assembling it into a pattern. This method is only suitable for hand-sewing.
The American Method is to mark the seams directly onto the fabric pieces and sew them directly together. The advantage of this method is that this can be used for both machine and hand-sewing.
Both methods rely totally on care and accuracy with the the marking and cutting of the fabric. Attention to this kind of detail will make a big difference to the finished quality of the project.
When hand-sewing place the pieces right-sides together, and use a small, even running stitch, securing every few stitches by a back-stitch, making sure that you have a 6 mm seam.
When machine sewing, use an average sized stitch comparable with the fabrics that you are working with, and again leave a 6 mm seam. To strengthen the seams, do not press them open. Press them to one side, preferably toward the darker piece of fabric so that they don't show through. Wherever possible join fabrics in units to form strips.
Join squares in straight rows within each block, then join blocks into strips. At cross seams, alternate the direction of the seam allowance to distribute the bulk of the fabric more evenly.
You may need to trim the seam allowance. This is particularly so when you find that you have a number of seams converging to a point. Press each seam as it is completed.
HOW TO PATCHWORK AND FINALLY FINISH OFF WITH QUILTING
Often, after a patchwork project has been finished, people like to add more interest to it by quilting it. See this page for more details on quilting and how to finish off your project with binding.Looking for a free craft forum? Visit our new craft forum and make a contribution today! We look forward to meeting you.
Remember too that if you are looking for books, magazines, patchwork kits, tools or online supplies for your next project visit our Online Patchwork Shop and our Online Quilting Shop.
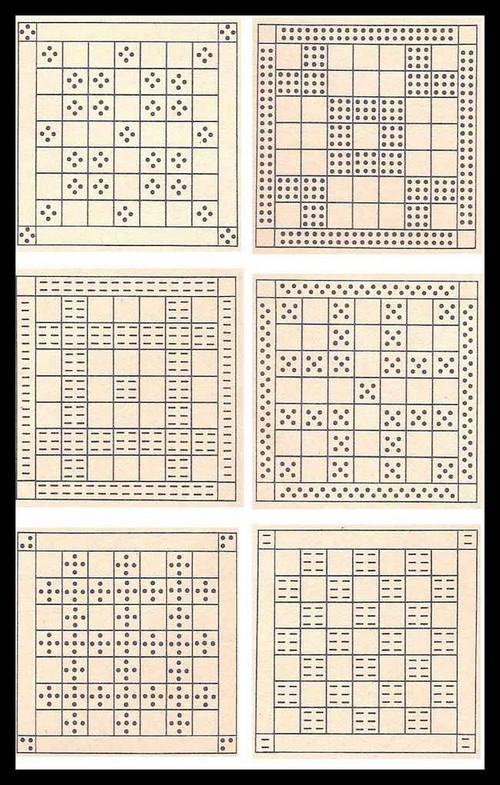
HOW TO PATCHWORK: SOME FREE DESIGNS FOR YOUR PATCHWORK QUILT
Here are 6 designs for simple strip patchwork that we hope will inspire you for your next project on how to make a patchwork quilt.

You can Add your Own Comments On Learning How to Patchwork!
We have lots of pages where you can contribute to throughout this website. We love hearing from our readers, and hope you will be one of those we hear from too. Feel free to tell us about your own patchwork projects, tips, advice and experiences in learning how to patchwork.
Leave a Comment
Do you have anything that you would like to add after reading this page? We would love to hear your thoughts. If you can add additional information to what has been written here you will be adding value to the website! No need to have any special skills - just type and submit. We will do the rest!
Other Comments
Click below to see comments from other visitors to this page...
My work in Patchwork 
I thought I would show you some examples of the type of patchwork that I do, so I have uploaded a couple of examples of my patchwork.
I also have a …
Eating Weeds and a Nervous Newbie Not rated yet
Great page, very helpful for a nervous newbie, thank you :)
***
Hi Linda,
You don't need to be nervous, but you certainly need to make …
Great information for a Patchwork Beginner Not rated yet
I have read your page on how to patchwork and have found it most interesting and easy to follow. I will try to do something that is easy and basic as the …
Did you find this page helpful?
Sharing is a way of saying, "Thanks!"
Follow Us and Keep Up to Date
Don't miss out on our latest news and articles. Sign up for our free monthly e-zine!


OTHER SECTIONS OF INTEREST
 How to
Quilt
How to
Quilt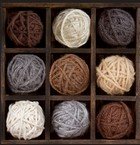 Wool
Crafts
Wool
Crafts
Country Crafts
New! Comments
Do you have something of value to add? Leave me a comment in the box below.