Quilting Instructions
and How to Quilt by Hand or Machine
Introduction on How to Quilt
Learning how to quilt is fun, and you will have hours of satisfaction making something beautiful that will last for years. Quilting and Patchwork are often mentioned in the same breath as you will often find patchwork that has been quilted for added interest. However, not every patchwork project needs to be quilted and not every quilt is made up of patchwork pieces.
Traditionally, quilting is done by hand with fine, even running-stitches. However, nowadays, it is also acceptable for quilting to be done on the sewing machine.

How to Quilt Instructions and Materials
1. Quilting Needles for hand-sewing should be short and fine, known as "betweeners" as these needles slip into and out of the fabric with ease. If you are a total beginner you will probably want to start with No.8 needles, as these are more manageable when first starting out.
However, as you get more practice and become more proficient, you can then use No. 10 quilting needles which will allow you to make even smaller stitches. If you are going to use your sewing machine for quilting, then the size of the needles you will use will be determined by the thickness of the material.
2. Quilting Thread used should be quilter's thread which comes in all sorts of different colors.
3. Hoops or quilting frames should be used to contain your fabric, which then makes it easier to get those stitches as neat as you would like. Both of course have their advantages. The hoop is ideal for pieces that are small and can be transported from place to place. Larger projects such as quilted bedspreads will need a quilting frame. This then limits where one can quilt and is not that easy to take from place to place.
4. Quilting Wadding or Batting is the center fill that will give your work padding and that quilted look. Quilting has 3 pieces of material; the top pattern, the middle filling which is usually polyester, and the bottom backing piece of material which can either be in a matching plain color, or the same as the top piece.
This batting, or wadding, comes in different sizes and thicknesses depending on the project. Make sure that your wadding comes in one piece and that you pre-wash it before using it in case it shrinks.
5. Thimbles are things you either love or hate. Some quilters prefer using the thimble on the index finger of the hand that works below the quilting material to prevent the many pricks you will encounter when learning how to quilt if you are not careful!
All of the above quilting supplies, including some lovely quilting frames can either be purchased through our Country Corner Store, or at your local craft store.
How to Quilt and Marking your Fabric
In learning how to quilt, unless you have pictures on your fabric that you want to quilt around, more often than not, you will want to either put transfer patterns on your fabric, or you will want to mark the fabric yourself by hand.
You can do this by placing the quilting pattern under the quilt top and lightly mark the design before you tack the 3 pieces of material together. You can mark out your pattern with a hard lead pencil or, if you are using a dark-colored fabric, you would use a chalk pencil.
Be sure to test water-soluble pens before you put it on your fabric to see if it can be easily removed. You would hate it if you the fabric remained stained after use.
How to Prepare your Quilting Material
Taking the time to prepare your material properly will pay dividends later on. By doing so, you then anchor all three pieces of fabric together and there is no chance of one piece of material slipping out of place.
For hand-sewing you should always follow the same procedure, not matter how small your project is. What you need to do is to make sure that each of the 3 pieces of fabric is lying flat when you are pinning them together and that you have the right sides of the fabric facing outwards.
In order to achieve this, lay your bottom piece of material on a large, flat area, with the pattern facing downwards. The wrong side of the material is facing you. Next place the batting or wadding on top of this material making sure that the bottom piece has not moved in any way. Now lay the top piece of material on the top, making sure that the pattern is facing you, and the wrong side of the material is facing the wadding.
Your next step is to make sure that you secure all 3 pieces of material together so that they won't move in the future while you are quilting. First of all you can take dressmaker's pins, or glass-headed pins and secure middle of the fabric without moving it too much. Then, working your way outwards pin the rest. When you are finished, go back and tack the material starting again in the center, making a small sunburst. Then using each of those lines radiating out from your sunburst extend each of these lines to the edge of the material. Always start from the center and work your way outwards.
Finally, tack all around the edge of your project to make sure that you have all edges secure.
Whether you are going to sew your project by hand, or by machine, the way in which you prepare your material is the same.
How to Quilt by Hand
The aim of hand quilting is to sew small, even stitches that give the impression that it was made by a machine. Now, this is not easy, especially when you are first starting out. My advice is to take a small sample of the same materials that you are using in your project and practice on that first. It will then give you some idea of how the material feels when you sew, particularly when working with the batting or wadding, as it is very 'airy', and even more difficult when it is very thick. Once you have mastered lovely stitches, then you will have the confidence to tackle your actual project.
When you begin your work make sure that you have a double knot in your thread to prevent your work from unraveling in time to come. When you end your work, again make sure that you have finished with a double knot. However, these knots must be hidden in the middle of the batting.
As a hand quilter, you should choose a light-weight batting as this will make your life a lot easier when you are trying to quilt your patterns and will allow you to get those small, even stitches that you are after. A thin batting also gives a more authentic look to traditional quilt designs.
How to Quilt using a Sewing Machine
If you are a considering to be a serious quilter then you may want to think about investing in an attachment for your sewing machine which will make your life a lot easier. Prices for these can also be seen through our Quilts and Quilting section.
How to Finish Off your Quilt
Cut the material lengthwise, crosswise, or on the bias of the fabric. These strips should be about 1 1/2 inches in width and sewn together end to end with a 1/4 inch seam. Press the seam allowances open before you use them.
Trim your quilt batting and bottom layer so that they are equal to the size of the quilt top. Leaving about 2 inches extra at each end, place a binding strip on the edge of the quilt top, right sides together. Sew through all 3 layers with a 1/4 inch seam, beginning and ending at the seam line. Repeat for all sides.
Now fold the binding to the back, tuck under 1/4 inch, and blind-stitch it down along the seam line. When you get to the corners you will need to trim the excess, and tuck in the edges. Now stitch. Rinse out any markings that still remain from your graphite pencil or marker.
A nice touch to any finished quilt, considering how many long hours will have gone into finishing this project, is to embroider your name and date on the back of the quilt.
How to Build a Quilting Frame
First of all you need to get 4 flat wooden boards, about 1 inch deep and 3 inches wide and slightly longer than you want your quilt to be. Now get 4 C-clamps from your hardware store clamp them into position to make either a square or rectangle according to the shape of your quilting project.
Place some batting onto each of the 4 boards and some cotton sheeting on top of that and wrap it around once and then staple this to the boards. You need this so that you can pin your quilt to the frame.
FREE CRAFT FORUM
Looking for a free craft forum? Visit our new craft forum and make a contribution today! We look forward to meeting you.
QUILTING INSTRUCTIONS AND HOW TO QUILT: CARING FOR YOUR QUILT
Your quilt has probably been made to be decorative, rather than for warmth, so therefore of an evening time, when you go to bed, rather remove the quilt completely or turn it down to avoid getting it dirty.
When washing a quilt, do so by hand and dry it out of the sun, as the sun will only leach the colors out of it and weaken the fabric. This should also be taken note of if your bed is in full sunlight during the day. If it is, draw the curtains to keep the sun off the fabric.
When washing your quilt use warm water, never hot, and squeeze excess water out gently, never wring your quilt. If your quilt needs to be ironed, do so, but iron it on the wrong side. If you need to store your quilt make sure that you wrap it in non-acidic paper. This and other quilting supplies can all be bought through our online store.
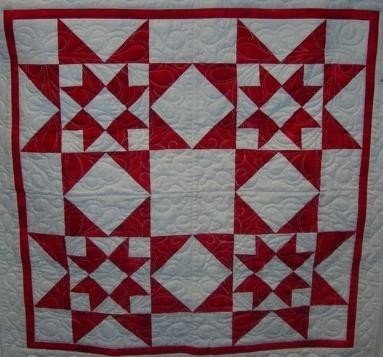
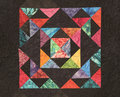
Finally, if you are looking for some free quilting patterns and designs we have some on our other page.
Quilting Instructions Through a Free Quilting Video
Watch the 4 part series below. This is a free video with quilting instructions on how to quilt. It shows you how to add piping to your quits so that you finish them off neatly.
BEST SELLING BOOKS GIVING FURTHER QUILTING INSTRUCTIONS

Don't miss out on our latest news and articles. Sign up for our free monthly e-zine!
NAVIGATION COLUMN
Find us on Google+Country Shopping
Country StoreFree Stuff
Free MagazinesHomesteading Blogs
Country Living Blog Gypsy's WanderingsCountry Living
Country Home Country Living Country Crafts Country Holidays Picnics CampingSelf-Sufficiency
Self-Sufficient Living Organic Gardening Do It Yourself Easy RecipesHomesteading
Homesteading Today Homesteading Q & A Homestead Animals Urban Homesteading Homestead DirectoryGoing Green
Green LivingFarms Around the World
South Africa United Kingdom United States Canada Central America Australia New Zealand Europe Farm Photos Farming Articles True Farming Stories Farms for Sale Organic Farm ProduceMiscellaneous
Guest Book Search Site Survey Advertise with Us


OTHER SECTIONS OF INTEREST
 How to
Patchwork
How to
Patchwork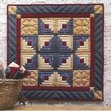 Online Quilting Store
 Free Quilting Patterns
New! Comments
Do you have something of value to add? Leave me a comment in the box below.