Drying Fruit by Oven or Sun with DIY Plans for a Homemade Fruit Dryer
Drying fruit and drying tomatoes. Instructions for solar drying and oven drying plus plans to build your own homemade fruit dryer.Introduction to Drying Fruit
Drying food such as fruit and vegetables to keep for later use is one of the oldest and most simple ways of preserving food. So when you have a glut of your fruit this season think about drying them as well as bottling and making jams and jellies. Dried fruit can easily be reconstituted with boiling water and left to stand overnight. In the morning they can then be stewed and served with yogurt for breakfast, or you can dry your fruit for trails and camping. The only downside to drying fruit and vegetables is that you can really only dry small quantities at a time.
Equipment for Drying Fruit
Drying fruit equipment is very simple as you can see below. There really isn't anything here that you couldn't find in your kitchen.
Drying Fruit Trays: A slatted wooden tray or some non-ferrous cake racks are suitable. If you are drying the fruit in the oven, the oven shelves can be used.
Cloth: A few pieces of muslin or cheesecloth will be needed to come between the fruit and the trays. The more open-weaved the cloth is, the better it is for air-circulation to occur.
Heat and Air: The fruit will need to be dried in hot, well-ventilated conditions. If this does not occur you run the risk of you fruit spoiling with mold.
Drying Fruit in the Sun
Of course the sun is what our ancestors used before modern conveniences and it works well as long as you take some things into consideration. Firstly, for sun drying fruit, make sure that your fruit is covered with muslin or cheesecloth so that you don't have flies laying their eggs in the fruit.
Secondly, when sun drying fruit you should only dry the fruit on sunny days, that don't have a chance of a downpour of rain. Summer is by far the best time of year to do this.
Lastly, when sun drying fruit, always bring your fruit inside at night, and replace it outside in the morning.
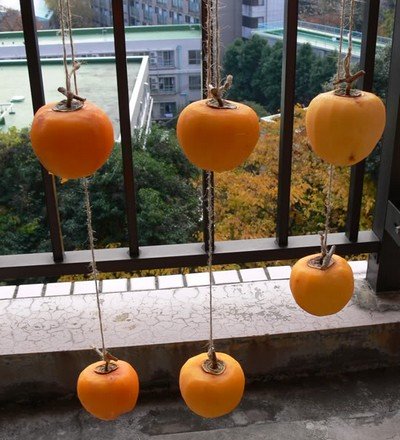
A novel way of drying fruit. Persimmons drying from a balcony

Drying Fruit in an Oven
You can use your oven to dry fruit. Most types of ovens are fine for oven fruit drying; electric, solid-fuel or gas will all work.
The ideal temperature you should be aiming for is between 49°C (120°F) and 66°C (150°F). With such a wide temperature available, most fruit drying ends successfully.
Drying Fruit in Front of the Fireplace
I have had fun this winter spending time peeling and coring apples, slicing them into rings and then threading them on a bamboo stick and then drying them in front of the fireplace.
I place the apple slices in lemon water while I am peeling them all, so they don't turn brown while waiting. If the rings aren't completely dry the first night, I just place them back in front of the fireplace a second night. It never takes more than 2 nights to dry, and they are still lovely and chewy - just how I like them!
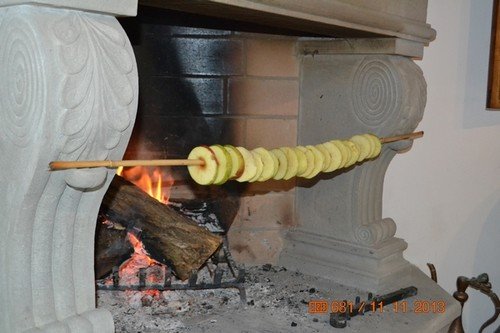
Drying apple rings in front of the fireplace
Drying Different Fruit
To prepare stone fruit for drying, such as peaches and apricots they must be cut in half and then remove the stones. Lie them down, cut side up on the trays, being careful that they are not touching to allow adequate circulation.
Drying Figs. Figs are not cut, but left whole. Place them bottoms down on the trays. They can be flattened with the palm of one's hand as they start to dry, pressing them flat from the center down.
Drying Grapes. Grapes can be dried either on the bunch or off, depending on what taste you want to achieve. If you remove all the grapes from the stalks you will end up with raisins or sultanas that are slightly more dry than those you can buy commercially.
If you leave the grapes on the stalks and dry them on the bunches, you will end up with a very yummy grape that is almost alcoholic in taste.
Drying Apples. With apples they need to be peeled and cored, and then sliced into rings. Don't worry about your apple rings turning brown. This is perfectly normal and is only a visual problem, not a problem with the drying process. The only reason why you see snow-white apple rings in commercial sales is because they have been heavily doused with sulphur-dioxide.
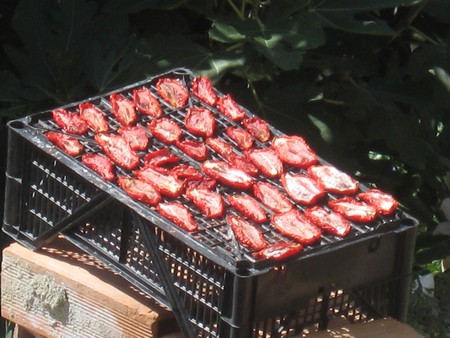
Italian tomatoes drying in the sun
Drying Tomatoes. Tomatoes have been dried in the open sun for centuries in Italy. Packed with flavor and taste, if they are dried correctly they are great to use in salads and Italian dishes. Successfully dried tomatoes will still be fairly soft, those not so will be like shoe leather and about as interesting to taste!
Choose firm ripe Roma tomatoes as these are not as watery as other tomato varieties. Dip the tomatoes in boiling water and then ice water and then dry, core and slice lengthways. Sprinkle with a little salt. Place on racks covered with muslin and protect from insects. Dry over several consecutive days on a summers day where the temperatures are about 29°C /85°F. with a relatively low humidity. You will know when they are dry when they are slightly chewy before the leather stage!
Place in a freezer for 48 hours to kill any insect eggs that might have gotten into your tomatoes. The pack in bottles of olive oil.
Tips for Drying Fruit Successfully
The best tip in the drying fruit process is to make sure that you only use the best fruit that has been tree-ripened. Discard any fruit that has been eaten or stung by insects. Any fruit that is overripe will not dry successfully.
Make sure that all drying racks are covered with your cloth of choice and place your fruit in a single layer, without touching on the racks. Cover again with your cloth if you are putting them outside.
If you are placing them in the oven, place on a single layer, without touching on your oven racks, without the cloth of course! Set your oven on its lowest setting.
It is quite possible when drying fruit that your fruit will take as long as 6 hours to dry if you are doing apples, and longer if you are doing apricots or peaches, even up to 24 hours for peaches. But if you are doing something small, like grapes, they won't take very long at all. Leave the door open slightly if you can't get the temperature down.
What can go Wrong when Drying Fruit
Remember you want to dry your fruit, not cook them!This is something to remember, even if you are drying fruit in the sun. If you expose the fruit to direct sunlight, they will cook, turn a dark colour and be quite 'jammy' in taste. Therefore any fruit dried outside should be shaded for best results.
This can be achieved with either a purpose-built dryer or you can modify a bookcase for your drying needs. We have plans for a homemade food dryer here. Fruit Dryer Plans.
Allowing for plenty of air-circulation is important for successful fruit drying. If not, you will end up with mould on your fruit which will then have to be thrown away.
Finally, when drying fruit look out for insects and ants. Insects can lay eggs in the fruit while it is drying which will result in worms hatching at a later stage.
You can sort the ant problem out more readily by placing the legs of your dryer in containers of water on all four sides. Ants can't swim and water will make it impossible for them to crawl to your fruit.
Drying Fruit and Knowing when it is Ready
Drying fruit slowly really is important for a good result, so don't rush things. It can take days before your fruit dries, it really depends on the type of fruit you are drying and the water content of each. Some dry faster than others. So when you are drying it is best to place the same type of fruit on each rack, rather than mixing different types of fruit together.
You will know when you fruit is ready when most of the moisture has been removed. If you remove your fruit too early, it will spoil. Once you are happy with the state of your fruit let it cool down for several hours before storing it.
How to Store Dried Fruit
You can store your dried fruit in brown
paper
bags with the top loosely folded over. This allows the fruit to store
without spoiling. You can also place them dark jar, stored in a dark
place, but the lids should be loose, not tight. If you do place them in
air-tight containers then the fruit has to be eaten fairly quickly.
You may also be interested on our other sections on fruit. We have a section on planting and pruning fruit trees, as well as a section on pests and diseases of fruit trees.
Did you find this page helpful?
Sharing is a way of saying, "Thanks!"
Follow Us and Keep Up to Date
Books on Drying Fruit and other Drying Foods
Don't miss out on our latest news and articles. Sign up for our free monthly e-zine!


OTHER SECTIONS OF INTEREST
 Self
Sufficient Living
Self
Sufficient Living Canning
Recipes
Canning
Recipes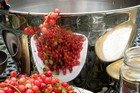 Jelly
Recipes
Jelly
Recipes Jam
Recipes
Jam
Recipes Country
Recipes
Country
Recipes
New! Comments
Do you have something of value to add? Leave me a comment in the box below.