Smoking Meat, Fish and Poultry with Brine Recipes
One thing is for sure, the mouth-watering taste of smoked food has been around a long time and no indication that its popularity is about to decrease any time soon.
So how do you smoke meat? Well, the meat is usually placed in a brine and after a time, removed and placed in a smoker or purpose built smokehouse.
Air is drawn in at the bottom of the smoker over smouldering wood. The smoke passes around the meat carrying heat with it as it looks for the escape hole at the top of the smoker. Because the meat is surrounded evenly by the smoke and heat, there is no necessity to turn the meat. After a time, the meat is preserved through the smoking process.
How to Smoke Meat
1) Smoke Cookery2) Cold Smoking
3) Hot Smoking
1) Smoke Cookery for Meat
This is where temperatures can be anywhere between 200 - 400 degrees F. Smoke cookery is not much more than taking a Weber barbecue, putting the meat over hardwood chips on the charcoal and cooking the meat with the lid on.2) Cold Smoking Meat
This is where meat for smoking is placed on racks a good distance from a low temperature smouldering fire at about 90 degrees F. from several days to 4 weeks. Cold smoking is also known as hard smoking.The most important aspect of cold meat smoking is that the temperature should always be maintained at 90 degrees F. at all times, otherwise the outcome will not be as expected. Cold smoking meat involves constant attention to the fire and round the clock care that it doesn't exceed or drop below this level.
3) Hot Smoking Meat
Hot smoking meat is where food is preserved in temperatures from 100 - 190 F. These high temperatures allows the meat to be entirely or partially cooked while also adding the smokey flavor.Hot smoking meat is by far the most popular methods of smoking meat. With a few ingredients and a good smokehouse, you can soon turn out hams, turkey, fish, sausages, and other foods that have an old-fashioned flavor that no other commercial food can give you.
3 Basic Steps to Smoking Meat
Smoking
Meat in the Smoker

No matter what method you use to cure your meat, there are 3
basic steps to smoking meat:1) Brining
2) Drying
3) Smoking
Smoking Meat Results are Affected by the Following:
1) The strength of the brine and what you put in it2) How long you leave your meat in the brine
3) Your smoking temperature
4) How long your meat will be in the smoker or smokehouse
5) The type of wood used
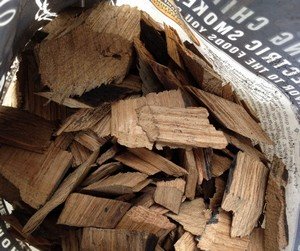
What Wood to use for Smoking Meat
 The smoke flavor of your meat will depend on
what type of wood you have
choosen for your fire. Only hardwoods are used, and there are several
favorites:
The smoke flavor of your meat will depend on
what type of wood you have
choosen for your fire. Only hardwoods are used, and there are several
favorites:1) hickory
2) alder
3) maple
4) beech
5) oak
6) nut trees
3) cherry
4) apple
However, there are also people who will used grape vines, corn cobs, coconut husks and even seaweed to smoke meat with.
However, the most popular choice of wood for smoking meat is using hickory. Hickory sawdust is one of the finest smoker fuels you can get, as it smokes slowly, evenly and gives off more smoke than most other woods. Make sure that whatever wood or sawdust you use, that it is dry. Any wet wood or sawdust will raise the temperature to a point where it is possible that you will end up burning or cooking the meat, rather than smoking it.
Adding small pieces of hickory wood to the sawdust will produce more smoke and it will burn for longer.
Avoid the following woods for smoking meat:
1) pine2) fir
3) hemlock
4) eucalyptus
or any other resinous or evergreen wood fuel as it will give your food a bitter taste.
Smokers and Smokehouses
Smokers and smokehouses can be simple to expensive, elaborate affairs. It really depends on how much money you want to invest in such a hobby.You can make a simple smokers from a 44 gallon drum to large, purpose built smokehouses. Some of these designs can be seen on our page on Smokehouses.
Your choice of smoker will depend on:
1) The amount of space you have2) Whatever you choose can be sealed in some way so that you can control the inside temperature.
Curing your Meat before Smoking
Curing your meat is probably the most important aspect of the smoking meat process. It is here that you will prepare your meat for your smokehouse and this can be done in 2 ways:1) A Dry Cure
2) A Brine Cure
Both are mixtures using salt, sugar and spices as a preservative.
The dry cure is when the salt, sugar and spices are rubbed directly into the meat. Curing meat this way will normally produce a saltier produce and causes more shrinkage. Dry curing can usually work faster than the brine cure. However, remember to always wash the brine off the meat and allow it to air dry for a while before placing it in the smokehouse.
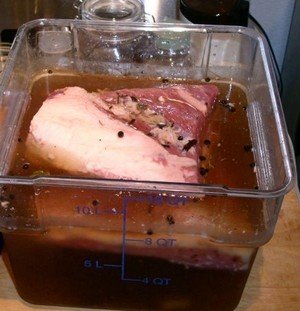 The brine cure is when the meat is soaked in the
salty brine, along
with the sugar and spices mixed into the water.
The brine cure is when the meat is soaked in the
salty brine, along
with the sugar and spices mixed into the water. Curing the meat this way results in less shrinkage, and leaves the meat a little moister, and seems to retain a better flavor than a dry cure.
If you are using the wet brine curing method make sure that the meat is completely submerged at all times, and you can do this by adding a weight such as a plate or similar to keep the meat submerged. If you don't your meat will spoil.
Whatever cure method you use make sure that you use an appropriate container. You can use glass, plastic or enamel. Stoneware is excellent. Never use metal, especially aluminum as it may cause the meat to discolor and pick up a bitter, metallic taste. Salt reacts with aluminum, actually disintergrating it into the brine.
The Process for Smoking Meat
Whether you use the dry or wet method of curing, the end product should be the same. The salt draws out the water from the meat. This prevents the micro-organisms from spoiling the meat that normally need water to flourish.More water is drawn out of the meat once it is placed in the smokehouse or smoker.
A balance is needed when smoking meat as you don't want to end up cooking your meat. The process should be slow enough to just remove the water from the meat without any cooking taking place.
However, if you don't smoke your meat quickly enough, or you don't add enough salt to your curing mix, you run the risk of ending up with spoiled meat.
Salt used in Curing Meat
You need to buy the right type of salt for curing your meat. You should be able to buy curing salt from butchery shops. However, if you can't find curing salt, then try and get dairy salt. Pure salt has fewer chemical impurities and will penetrate your meat a lot quicker and not produce a bitter taste in your food.However, if you cannot get any of the above, you can use regular table salt as a last resort. Rock salt is perfectly acceptable and will help speed up the curing process.
Sugar used in Curing Meat
The sugar used in meat curing is usually brown sugar or molasses. The use of salt is to reduce the hardening effects of salt on the meat.How much Sugar, Salt and Spices for curing Meat?
You should soak your meat in a prebrine solution to get rid of any excess blood and water from the meat by mixing 1/2 cup salt to 1 quart water and leave the meat in there for 1/2 hour.
After that you can use a regular brine for your meat that will be submerged from 2-8 hours. At the end of the normal brining time, remove the meat and always rinse it off under cold running water. The allow it to air dry for about 1 hour at room temperature before placing into the smoker.
If you have done your curing process correctly, as the meat is air drying a tackly glaze should begin to form on the outside of the meat. If the wash and dry part is skipped your meat will sweat, creating a black condensation on the inside of your smokers and smokehouses and this then drips back down onto the meat as it smokes, resulting in a sour taste.
Smoking Meat - Fish
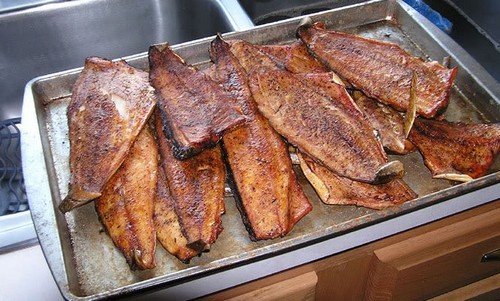
Smoked Fish
Any fish caught should have the gills cut out of it immediately after
being killed, as well as being gutted to remove any of the innards that
would spoil the fish if left in. The fish should also be bled if it
can, before being put into the cooler box, or into a cool place until
you get home.Make sure that remove the head, fins, tail and then cut the fish into fillets. Make a solution of 1 cup salt to every 3 quarts of water and dip the fish sides into the salt solution briefly. If you want to, you can place the fish in this solution in milk and juice cartons, fully submerged and freeze in the salted water. Freezing your fish like this will allow you to keep the fish in the freezer for 8-12 months.
Freezing fish first makes better smoked fish as the freezing seems to open up the cells to accept the smoke better. However, make sure that when you thaw the frozen fish that is should be done slowly. Thaw in the fridge or at 37 - 40 degrees F.
After the fish has been thawed, press your finger into the flesh and it should spring back. If it does, then it is fresh. If not, then your fish is probably borderline and will spoil.
Refrigerated smoked fish will last about 2 weeks. Frozen smoked fish will last almost a year.
What fish can be Smoked?
Think beyond salmons, and herrings. The following fish can be smoked:1) striped bass
2) sturgeon
3) tuna
4) blues
5) smelt
6) halibut
7) trout
8) cod
9) bass
10) steelhead
Recipe for Smoking and Brine Curing Fish
Mix the following ingredients in a brine container:For every 1 quart of water -
2 cups brown sugar
1 cup curing salt
1 cup rock salt
This mixture will cure up to 10 lbs of fish, no problem.
If you wish to add spices to your fish you can add one or more ingredients to the brine, but you will have to experiment to see which spices you like:
1) white pepper
2) onion salt
3) garlic
4) molasses
5) honey
6) all spice
7) mace
8) ginger
9) bay leaves
10)dill
11)lemon juice
12)brown sugar
13)tabasco sauce
14)soy sauce
Place fish skin side up in brine. Submerge a large dinner plate or additional weight of some sort to submerge fish in the brine.
Cure the fish in the brine for 5 hours-6 hours, depending on how salty you want your fish to taste. After this period, rinse each piece of the fish, rubbing the fish gently until the slippery feeling from the brine solution is gone.
On a kitchen towel, spread the fish out and pat any excess moisture away with paper towels.
Allow the fish to air dry for 1 hour. You will know when the air drying step is complete because fish gets a tacky glaze on the outside, as mentioned before.
Make sure that your smoker has been started well before you place your fish inside.
If you want to add additional flavor to your fish such as garlic, onions etc. it should be done now.
Now place your fish in the smoke house, either on hooks or if you are using a smoker on racks. Place the thinner pieces on the top rack so they do not dry out too quickly. Arrange the fish, skin down and make sure that the smoke can circulate around each piece freely. There is no need to turn your fish once on the racks.
Outside temperatures should be taken into consideration when smoking food. The colder the temperature, the longer it will take for the fish to be smoked.
Remove your fish from your smoker, brush with melted butter or oil to improve the appearance, let it chill at room temperature for 30 minutes and then refrigerate in air tight containers to chill for 1-2 hours before serving.
Your finished smoked fish won't be brightly colored as commercial products are. So don't be disappointed. Just remember it will taste amazing! Far better than any commercial product you can buy.
If you have a smoker that you are using, then you will need to restock your smoker tray with the sawdust used for smoking. It is best to wait for the sawdust to burn out before replacing. This will take about 1 1/2 hours so in a 5-6 hour process you will need to fill up the trays about 3-4 times.
After 5 hours of smoking test to see if your fish is ready. The flesh will be dark in color and firm to the touch. The outside should have a dark, glazed appearance. If you pull the fish apart, it should flake easily.
Recipe for Smoking and Dry Curing Fish
Clean, gut and clean the fish as for brine curing. Any pieces of fish that are thicker than 1 inch should be scored with a knife to make sure that the salt cure mix can penetrate the flesh.Standard Dry Cure Recipe
2 cups brown sugar4 cups curing salt or
2 cups rock salt and 2 cups curing salt
Rub the cure mixture into the flesh and place each fish side skin down staking them one on top of the other in a large, deep brine container.
Place a dinner plate with a 5 lb weight on top of the fish and leave at room temperature for 4 hours.
Drain away excess liquid, remove fish from container, and rinse each piece thoroughly under a running cold tap. Dry off with kitchen paper, lie skin side down onto a kitchen towel. Add any additional seasoning at this point.
Air dry the fish for 1 hour until you get a tacky glaze on you fish.
Your fish is now ready for smoking by following the same process as above.
Recipe for Smoking Herring or Anchovies
Use only fresh anchovies. Remove head and guts with a pair of scissors. Large anchovies or herrings can be split down the back and butterflied out.Prepare the standard fish brine and cure the fish in the brine for 30 - 45 minutes.
Remove from brine, rinse under running cold water, and air dy for 60 minutes. Place into preheated smoker, or prepared smokehouse for 2-3 hours.
If you want to dry cure your herrings and anchovies you can leave them to cure for 6-8 hours before smoking.
Smoking Meat - Chicken and Other Poultry
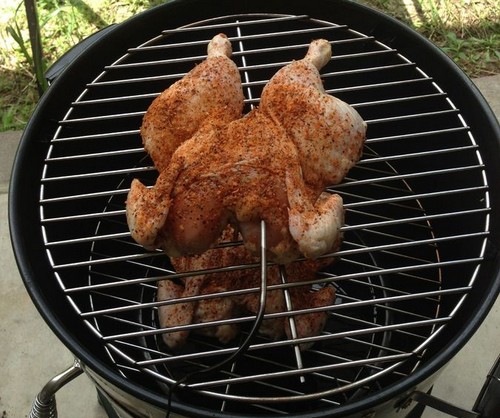
Two
Chickens ready for Smoking
Smoking poultry can be done using whole or halved poultry, or even poultry cut into pieces.
If your poultry is frozen, thaw it in the fridge completely before placing in brine for curing.
Standard Chicken Brine Recipe for Smoking
For every 2 quarts of water:1/2 cup brown sugar
1 cup curing salt
4 tablespoons black pepper
1 tablespoon onion powder
1 bay leaf
1/4 teaspoon lemon juice
1/4 teaspoon maple flavoring
After mixing the brine thoroughly, immerse the poultry using a weighted plate to make sure that the meat is completely submerged.
Let the chicken cure for 1 hour per pound.
Remove from brine, rinse under cold water, wipe away excess moisture, allow to air dry for one hour, as per the fish recipes above.
If you are smoking a whole bird, it should be suspended. Cut up pieces or halved birds should be placed on smoker racks.
Before placing the chicken in the smoker, rub the following mixture into the meat
1/2 cup brown sugar
1 tablespoon onion or garlic powder
2 tablespoons black pepper
Place chicken in preheated smoker, or smokehouse and smoke for 1 1/2 per pound. Place a foil plate at the bottom of the smoker to act as a drip tray.
Refill the pan of your smoker with sawdust about 4 times every 45 minutes or so.
You will also need to brush your chicken with butter every 1 1/2 hours. Other sauces can be added with your melted butter such as soy sauce, teriyaki sauce, barbecue sauce or beer.
To test to see if it is done, twist the leg bone gently. If it moves freely in the socket joint the bird is ready to eat. If for some reason your chicken did not cook through, then place in a pre-heated oven at 300 degrees F and finish off. Make sure that you do not over cook. The skin should be a golden brown.
You can freeze your smoked chicken meat for up to 7 months.
Smoking Meat - Jerky
Old Fashioned Jerky Recipe
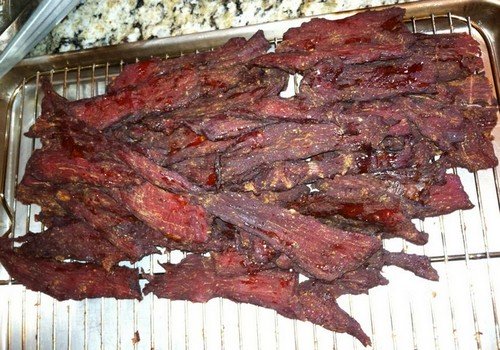
Smoked Jerky
Flank or round steak makes good jerky, but really you can make jerky out of any cut of the animal. But the cardinal rule is making sure that when you cut the meat you should cut it with the grain, not against the grain as meat is usually cut.
Trim off the fat as this will go rancid and spoil your meat. Slice the meat approximately 1/2 inch thick, four inches wide and 6-12 inches long.
Standard Jerky Brine Recipe
For every 2 quarts of water:1 cup curing salt
1/2 cup brown sugar
4 tablespoons black pepper
Using a non-metal container, place strips of cut meat into the brine solution so that it is completely submerged.
Cure the meat in the brine for 8-10 hours.
Afterwards, remove the meat, and wash each piece under a running cold tap and place on paper towels and remove excess moisture with more paper towels. Air dry for at least 1 hour until your meat has a tacky glaze. Now rub in other seasoning of your choice. Some people like garlic or onion salt, or even chili powder.
Place meat in a preheated smoker and smoke for 9-12 hours. Refill the hickory flavor pan every 2 1/2 hours.
You will know when the jerky is done when it becomes stiff. Break open a piece and check the inside. Remove from the smoker or smokehouse and cool. Smoked Jerky should be kept in the fridge.
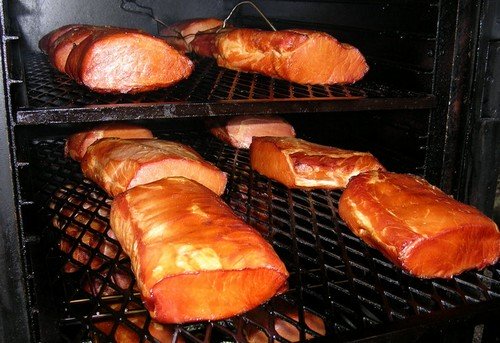
Smoking Meat - Ham
Hickory Glazed Ham Recipe
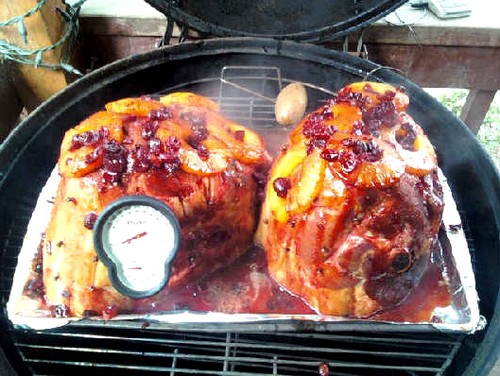
Two glazed hams in the smoker
Preheat the smoker and rub the outside of the ham with the following mixture:
1 cup brown sugar
1 cup curing salt
Spike with cloves - optional
Removing all the racks in the smoker except the last one, place the ham on the last rack and smoke for 4 hours, refilling the flavor pan every 80 minutes.
After smoking time is over, remove the smoked meat and cool and refigerate until needed.
Smoking Meat - Bacon
Home Smoked Bacon Recipe
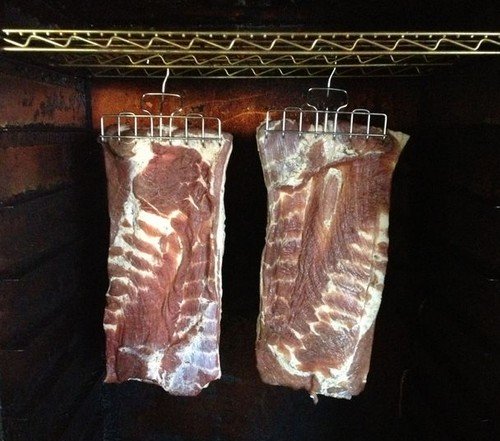
Bacon hanging up in the Smoker
Make up the following brine solution to the following proportions using boiling water. Allow 1 gallon brine solution for every 8 lbs of boned out pork loin.
1 gallon water
2 lbs 14 oz salt
1/2 lb soft brown sugar or 1/4 lb honey
Allow this brine to get cold and keep it covered. Take a 12-20 lb full loin of pork. Bone out the loin, or get your butcher to do it for you. Trim the meat.
You can cut the meat in half to make it easier to handle.
Soak the loin in the cold brine in an area that is at 5 degrees C. for 5 days. Stir the brine at last twice every 24 hours.
If you hold the brine at 5 degrees C. the salt can be reduced by 4 ounces per gallon as the solution gets stronger as it gets colder.
Remove from the brine, drain and hang in a cold dry place for another 5 days. You can use a fridge here.
Set up your smoker and hang up your bacon. Smoke for 15 hours between 80-95 degrees F. Replace your hickory pan 2-3 times in total, after every 6 hours.
After 15 hours of meat smoking, remove and hang in your pantry for 2-3 days before using.
If you find your bacon too salty, soak the bacon in cold boiled water for 2 hours and do a taste test. If still too strong, try again.
Conclusion
Smoking meat, whether it is fish, chicken, venison, ham, bacon, beef etc. is a simple process if you follow the steps shown. If you are looking to see how you can make your own smokehouses and smokers - some as simple as converting an old fridge - then please feed free to visit our other pages of interest on the right hand column of this page.You can Add your own Comments, Tips and Ideas on Smoking Meat, Fish and Poultry Here!
We have lots of pages where you can contribute to throughout this homesteading website. We love hearing from our readers, and hope you will be one of those we hear from too. Look around our homesteading website. If you have some comments, tips, recipes or ideas on smoking meat of your own, please submit them. All you need to do is type and submit. We will do the rest!
Leave a Comment
Do you have anything that you would like to add after reading this page? We would love to hear your thoughts. If you can add additional information to what has been written here you will be adding value to the website! No need to have any special skills - just type and submit. We will do the rest!
Don't miss out on our latest news and articles. Sign up for our free monthly e-zine!


OTHER SECTIONS OF INTEREST
 Smokehouses
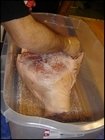 Curing
Ham
Curing
Ham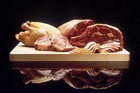 Preserving
Meat
Preserving
Meat Home
Butchering
Home
Butchering Self-Sufficient
Living
Self-Sufficient
Living
New! Comments
Do you have something of value to add? Leave me a comment in the box below.