Home Canning Basics: Simples Steps and Instructions on How to Can Food
Easy home canning instructions and timetables on how to can; including how to prepare your canning equipment, and details on the 7 methods of preserving fruit and vegetables as well as canning recipes on another page.
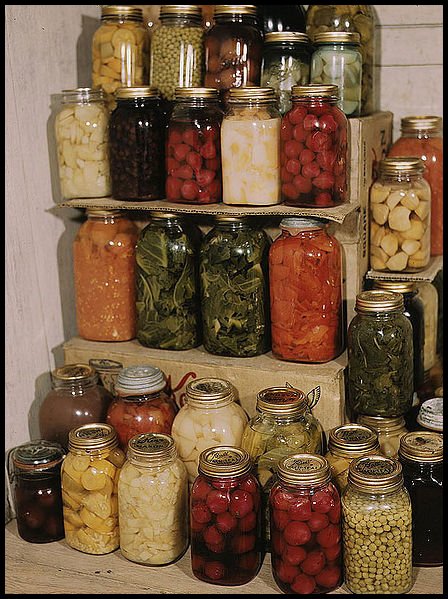
Canning food - meat, fruit and vegetables can be done using a variety of canning methods which will be discussed in due course and show you how to can the easy way! Here you will find a lot of practical information on how to can that will soon have you lining your shelves with home canned food. But first there are some precautions that need to be taken first.
Home Canning Tips
When preparing your canning equipment make sure that it is in good order. There is nothing worse than having gone to all the trouble of home canning and preserving your food, only to find that the seals, jars or lids were imperfect resulting in spoiled food.
- Jars must be free from leaks and cracks.
- Lids should have unbent edges. To test that they are fine, place the lids on the jars without the rubber seals. Screw them down tight. If they are right to use you will not be able to insert a penknife blade or a thumbnail between the lid and the jar.
- The rubber seals should be new every year. Bend them into little folds. If they crack, discard them. Test them too by stretching. If they return to their original shape you can be confident that they are fine to use. To test before filling, fill with water and screw down the lids. If they leak in anyway, discard.

Home Canning: Preparing Jars for Canning
- Canning Jars: Wash jars well with soap and hot water. Place them, filled with water, either upright of sideways, well apart in a deep pan of cold water. Bring the water slowly to the boil. Boil for 15 minutes. Keep the jars hot until ready for use for your next home canning.
- Canning Lids: Wash all canning lids in hot, soapy water. Place zinc and glass tops in very hot water for 5 minutes. Invert them to drain. Keep them hot until ready to use. Prepare lids that have a sealing composition by pouring hot water over them. Allow to stand until ready for use.
- Rubber Seals: Scald the rubber seals quickly. Do not boil them as this will weaken the rubber.
- Canning Utensils: Sterilize all other canning utensils that will be used in your home canning process. Wash them first in hot, soapy water, and then place them in a pan of boiling water.
- Canning Labels: You can buy canning labels below through our affiliate partner Amazon.com. Labels are very useful to have when you are home canning as they allow you to write down when your fruit or vegetable where canned, so you can check the shelf life of your final product. On your canning labels you can also write the name of the product and ingredients, if you wish.
Home Canning Acidic and Non-Acidic Food
Foods for home canning are considered to be in 2 groups: Acid and Non-Acid.
Acid Foods: Fruits, including tomatoes, pickled products, ripe pimientos, and rhubarb.
Non-Acid Foods: Vegetables, (the tomato is a fruit), meat, poultry, fish.
Acid foods may be canned using the following canning methods:
- 1) Open Kettle Method of Canning
- 2) Hot Water Bath Method of Canning
- 3) Oven Method of Canning
If the first two methods are used for home canning, the heat will not exceed the boiling point of 100ºC or 212ºF . If the third method is used, the food will be somewhat hotter. Either heat is sufficient to destroy all the bacteria in acid foods and if the sterilized utensils are used and rules are followed carefully there should be no subsequent spoilage.
Non-Acid foods must be processed in a steam pressure canner, also known as a pressure cooker, at 10-15 pounds of steam. This ensures a heat of 240ºF to 250ºF which is sufficient enough to kill all micro-organisms and bacteria in non-acidic foods. It is impossible to do this at lower degrees of heat.
The addition of lemon juice, vinegar or any other acidic additive does not change the acidity of the food enough to permit processing by any method other than the pressure canner/cooker. The exception is when food is pickled in vinegar, which may be processed with the hot water method.
Non-acid foods should not be used in home canning if you do hot have a pressure canner/cooker.
HOME CANNING FRUIT
How to Can Fruit Successfully
- Choose fresh, firm perfect fruit that is not over-ripe. Imperfect fruit is best left for making jam.
- Wash the fruit. Prepare and peel if necessary. To prevent the discoloration of large fruits after peeling, place them in a brine solution: 2 teaspoons salt to 1 quart water. Drain well.
- If cherries or plums are not stoned, prick the fruit with a large pin.
- Syrups for home canning can be thick or thin according to the acidity of the fruit and the taste of those who will eat the finished product.
| Syrup | Sugar | Water or Fruit Juice | Yield |
|---|---|---|---|
| Thin Syrup | 1 Cup | 3 Cups | 3 1/2 Cups |
| Medium Syrup | 1 Cup | 2 Cups | 2 1/2 Cups |
| Thick Syrup | 1 Cup | 1 Cup | 1 1/2 Cups |
Combine sugar and water. Stir over heat until sugar dissolves. Bring syrup to boiling point. Allow about 2 cupfuls of syrup to one quart of large fruit (pears, peaches, plums). Allow 1 cupful of syrup to one quart of small fruit (cherries, berries).
Home Canning Using Corn Syrup
There is not satisfactory substitute for sugar, as it intensifies the flavor of the food. A syrup of corn syrup and water without the addition of sugar is subject to mold. Even with sugar and corn syrup, the results are variable. Honey or corn syrup may be substituted in the following proportions:
| Syrup | Sugar | Corn Syrup or Honey | Water | Yield |
|---|---|---|---|---|
| Thin Syrup | 1/2 Cup | 1/2 Cup | 2 Cups | 2 3/4 Cups |
| Medium Syrup | 1 Cup | 1 Cup | 2 Cups | 3 1/2 Cups |
| Thick Syrup | 2 Cups | 2 Cups | 2 Cups | 5 Cups |
It is unwise to use a higher percentage of Corn Syrup
Home Canning using Water (Without sugar or syrup)
Substituting boiling water for sugar or sugar and syrup; add it to within one-half inch of the top of jars. When ready to use the fruit, drain it, add sweetening to the water (or juice), bring it to a rolling boil. Pour over the fruit, cool, then chill and serve.
Home Canning Fruit and Approximate Yields
| Fruit | Weight | Units | Yield |
|---|---|---|---|
| Apples | 2 1/2 lbs | 7-8 # | 1 quart |
| Berries | 1 1/4 - 1 1/2 lbs | 5 Cups | 1 Quart |
| Cherries | 1 1/4 - 1 1/2 lbs | 6 Cups | 1 Quart |
| Peaches | 12 - 2 1/2 lbs | 8 - 10 # | 1 Quart |
| Pears | 2 - 2 1/2 lbs | 5-6 # | 1 Quart |
| Pineapples |
|
15 # | 15 Quarts |
| Plums | 1 1/2 - 2 1/2 lbs | 24 - 32 # | 1 Quart |
| Tomatoes | 2 1/2 - 3 1/2 lbs | 8 - 10 # | 1 Quart |
Home Canning Methods
1) Home Canning Fruit using the Open Kettle Method
Add a small quantity of fruit to the boiling syrup, enough for 1 jar. Boil the fruit until tender. For hard fruits such as pineapples, some apples, quinces etc. cook these fruits in boiling water until nearly tender. Drain well. Finish cooking them in syrup. Use the water in which the fruit was cooked for the syrup.
Boil small fruits slowly. Test the fruit with a skewer or cake tester. Boil cherries for 5 minutes. If not stoned, prick cherries several times with a large needle. Have ready hot sterilized jars with a pre-sterilized rubber seal and lid. Working quickly, fill the jar with the fruit. The fill it to overflowing with the boiling syrup.
Take care not to burn yourself when home canning. Run the handle of a sterilized spoon around the fruit to release any air bubbles. Wipe the rim of the jar clean. Seal at once and screw down tightly. Set the jars well apart on several thicknesses of cloth. Cool them as rapidly as possible. Avoid cold drafts that may crack the jars. Tighten lids as jars cool, unless they are self-sealing lids, in which case, do not touch again.
In cooking berries (except strawberries), wash them by putting them in a colander and dipping it up and down in water. Wash 1 quart at a time. Pick them over removing any that are imperfect or that have mold. Add 1-2 cups sugar to 1 quart berries. Permit them to stand for 2 hours. Cook them with as little stirring as possible for 20 minutes. Pack boiling hot into sterilized jars. Use sterilized lids and seals. Complete seal at once.
2) Home Canning Fruit using the Cold Pack Method
Pack into hot sterilized jars with sterilized seals in place. Prepare Syrup for canning as seen above.
Pour the boiling syrup slowly over the fruit to within 1/2 inch of the top. If the fruit is canned with water, fill the jars to within 1/2 inch of the top too. Run the handle of a sterilized spoon around the fruit to release air bubbles. Screw the lids down, but not too tightly. That is complete the seal, and then turn the lid back 1/4 inch.
Allow this leeway to permit the steam in the jar to escape and to avoid breakages. If you are using glass-top jars fasten the bail only halfway. Exception: If you are using self-sealing jars when home canning, seal these completely. Process the jars at once in a very hot water bath, pressure canner or pressure cooker, or by steaming them in the oven. Instructions as seen below.
3) Home Canning Fruit and Vegetables using the Hot Pack Method
With the hot packing canning method fruits or vegetables are precooked for a few minutes in an open kettle (large pot). This causes the fruit or vegetables to shrink and eliminates blanching or dipping. Fruits are precooked in boiling syrup, vegetables in water. See charts below for details. Boil only 1 - 2 quarts at a time. Drop the fruit or vegetables gradually into the boiling liquid so as not to disturb the boiling point. Begin counting the time when all the fruit is immersed and the liquid boils freely again.
After cooking, drain the fruit or vegetables. Pack it at once into clean, hot jars with the rubber seals in place. Do not overcrowd the fruit. Fill jars of fruit to within 1/2 inch of the top with hot syrup. Seal the jars only partially, that is complete the seal and then turn 1/4 inch back. Self-sealing jars seal completely. Process immediately in a pressure cooker, (pressure canner), hot water bath or oven. See below for details.
4) Home Canning using the Hot Water Bath Method
A wash boiler is good for this purpose. Any large, deep pot with straight sides may be used. Pack jars and seal them as directed for the cold pack method or the hot pack method.
There is a rack made for the purpose of processing jars, but if you have none, place a wire cake cooler, a wooden rack of similar into the bottom of the boiler so that the jars will be sufficiently elevated to permit the water to circulate beneath them. Partly fill the boiler with boiling water. Place the jars in it, leaving a 2 inch space between them to allow the water to circulate freely.
Cover the jars well with boiling water.
Place a cloth over the top of the boiler before adding the lid to ensure the steam is kept inside.
Bring the water to the boil and allow the time given in the home canning chart below from that moment on. Keep the water, which must at all times cover the jars, at boiling point. Remove the jars and pace them on several thickness of cloth. Immediately on removing the jars from the boiler seal the jars completely. Tighten the lids again as the jars cool. Exception: Self-sealing lids. Do not touch these. Cool the jars quickly. Avoid cold drafts. Test the jar for leakages when cold. See below.
5) Home Canning Fruit using the Cold Water Bath Method
Use only for rhubarb, gooseberries and cranberries. Pare and cut rhubarb into small pieces. For young, tender rhubarb, pack into a sterilized jar. Place the jar under a cold water tap. Let the water run for 20 minutes, or pack the rhubarb and cover it with cold water. After 10 minutes drain off the water. Fill the jar to overflowing with fresh cold water. Adjust the sterilized rubber seal and lid. Screw the lid down tightly.
6) Oven Canning Methods
Seal jars completely, then
turn back top 1/4 inch. Seal
self-sealing lids completely. Place the jars 2 inches apart in a
shallow pan of warm water on the center rack of an oven that has been
preheated to 275ºF. Do not permit the heat to fluctuate. See chart
below for cooking details. Immediately upon taking the jars from the
oven seal them tightly. Tighten the lids again as the jars cool.
Exception: Self-sealing lids. Do not touch these. Place jars on several
thicknesses of cloth. Cool jars quickly. Avoid cold drafts. Test jars
for leakages when cold. See below for details.
7) Pressure Cooker Canning Methods
Do not crowd the jars, allowing for 2 inches around each jar for steam to circulate. Clamp the cover in place. Keep the pet cock open until all the air has been forced out of the container (until the steam escapes from it in a steady stream for 4-7 minutes). Close the cock.
When the required pressure has been reached begin counting the time given in the charts below for processing the product. Adjust the heat to keep the pressure at a uniform level. This is important when home canning. At the end of the home canning processing period remove the pressure cooker at once from the heat.
Permit the gauge to drop to zero and to remain there for a further 2 minutes before opening the cock slowly. Remove the cover. Remove the jars and complete the seal.
Exception: Self-sealing jars. Do not touch these. Place the jars on several thicknesses of cloth. Cool jars rapidly. Avoid cold drafts. Test for leakages when cold. See below for details.
HOME CANNING PROBLEMS AND TROUBLESHOOTING SOLUTIONS
How to Test Canning Jars for Leaks
Containers calling for rubber rings or seals should be permitted to cool. They are then placed upside down and tested for leakages. Do not invert jars that have self-sealing lids. These should be tapped with a spoon instead. If the sound has a clear ringing tone the jar is well sealed. If the note is dull a good seal has not been formed. Keep jars in a cool place for 10 days. Test them again during this time. Process them again if necessary.
If jars show any sign of leakage they should be opened and the contents should be examined. If the lid is imperfect use another sterilized lid in its place. If the jar is imperfect, heat the food and repack it in a sterilized jar. If the cover is perfect but the rubber seal is imperfect, replace it with a hot new rubber ring. If any case, reprocess the jar for 10 minutes.
In case of a bulging rubber press it back into shape while the jar is still hot. If the jar, when inverted still leaks, use a new hot rubber seal and reprocess the food for 10 minutes. The food, if reprocessed, will be over-cooked. To avoid this, it is better to serve at once.
Inspect every jar opened carefully after your home canning.The odor should be characteristic of the product. Any different odor indicates spoilage. There should be no outbursts of air or spurting of liquid on opening. If you suspect a spoiled jar, discard contents at once.
Home Canning Fruit Timings for Cooking
* These rules are for pint and quart jars.
* In this chart directions are for home canning processing in boiling water for an altitude of 1000 ft and less. For altitudes more than that the time for processing should be increased 20% for each additional 1000 ft.
* Place the fruit in boiling syrup. Begin to count the time from the time the syrup boils again.
| FRUIT | Preparation for Processing of Fruit | Processing time for Hot Water Bath | Processing time for Oven | Processing time for Pressure Canner |
|---|---|---|---|---|
| APPLE CANNING RECIPE | Pare, core, quarter. To prevent shrinkage, steam or precook in thin boiling syrup for 5 minutes. Pack in jars and cover with thin boiling syrup. Process at once for:(Or can using Open Kettle Method) | 20 minutes | 75 minutes at 250ºF | 10 minutes at 5 pounds |
| APRICOT CANNING RECIPE | Wash, halve, pit or leave whole, pack in jars and cover with thin boiling syrup. Process at once for:(Or can using Open Kettle Method) | 20 minutes | 68 minutes at 250ºF | 10 minutes at 5 pounds |
| BERRY CANNING RECIPE (see strawberries below) | Pick over, wash, hull. Pack in sterilized jars. Cover with boiling syrup. Process at once for: | 20 minutes | 68 minutes at 250ºF | 10 minutes at 5 pounds |
| CHERRY CANNING RECIPE | Wash, stem, and if not stoned, prick with a needle. Pack into jars, cover with medium to thick boiling syrup. Process at once for: (Or can using Open Kettle Method) | 25 minutes | 68 minutes at 250ºF | 10 minutes at 5 pounds |
| PEACH CANNING RECIPE | Pare, halve, pack in jars, covering with boiling medium syrup. Process at once for: (Or can using Open Kettle Method by paring, halving or leave whole) | 25 minutes | 60 minutes at 275ºF | 10 minutes at 5 pounds |
| PINEAPPLE CANNING RECIPE | Peel, remove eyes, cube fruit and pack in jars, cover with boiling thin syrup. Process at once for:(Or can using Open Kettle Method boiling fruit for 10 minutes) | 30 minutes | 60 minutes at 275ºF | 10 minutes at 5 pounds |
| PLUM CANNING RECIPE | Wash, prick, pack in jars, cover with boiling thin syrup. Process at once for:(Or can using Open Kettle Method) | 20 minutes | 60 minutes at 275ºF | 10 minutes at 5 pounds |
| RHUBARB CANNING RECIPE | Wash, cut into small pieces. Pack in jars, cover with boiling thin syrup. Process at once for:(Or can using Cold Water Method) | 16 minutes | 50 minutes at 275ºF | 10 minutes at 5 pounds |
| STRAWBERRY CANNING RECIPE | Wash, stem, add sugar (1 cup to 1 quart). Permit to stand for 2 hrs. Simmer for 5 minutes. Fill jars, seal. Process at once for: (Or can using Open Kettle Method. Add sugar, permit berries to stand 12 hrs. Boil them for 10 minutes.) | 20 minutes | 68 minutes at 250ºF | 10 minutes at 5 pounds |
HOME CANNING RECIPES AND CANNING VEGETABLES
Successful home canning calls for fresh, young, tender vegetables. Have them as freshly picked as you can. Look carefully for imperfections and discard if found. Wash and scrub the rest thoroughly so that they are free from soil. Can only a small amount at a time.
Tomatoes, may be cooked using the Open Kettle Method. See above. All other non-acid vegetables must be either blanched or precooked and then processed in a pressure canner. See the chart below for details. The object of blanching is to shrink the vegetables.
To blanch vegetables use a wire basket of sieve and a large pot. Prepare the vegetables for canning. Boil the water in the pot. Place about 4 cups or less of vegetables in the basket at a time. Immerse them in the boiling water. Cook them uncovered. Count the time given on the chart for blanching from the moment the water boils again after the vegetables have been immersed. See that the vegetables are scalded evenly. Spinach and other greens should be steamed until wilted.
To precook vegetables, drop them, a quart at a time, into boiling water.
Drain the vegetables. Have in readiness clean, hot jars with clean rubber seals in place and clean hot lids. Fill only as many containers as will fit into the pressure cooker at one time. Pack the vegetables evenly and attractively into the jars. Do not crowd or press them.
You may shake the jars to get a good pack. Since corn, peas and shell beans are apt to swell, allow about 1 inch space between the liquid and the top for this. Spinach and other greens are apt to shrink. Press them down lightly and cut through them several times with a knife.
Cover all vegetables, except those noted above, with boiling water (or with the water they were blanched or cooked in.) to within 1/2 inch of the top. Add 1 teaspoon of salt to 1 quart vegetables and water - 1/2 teaspoon to a pint. Work quickly. Vegetables and water should be boiling hot. Adjust the lids, screw them down tightly. Allow as short a time as possible between packing and processing when home canning. See Pressure Canning above.
HOME CANNING VEGETABLES AND APPROXIMATE YIELD
| Vegetable | Weight | Yield |
|---|---|---|
| Asparagus | 3 lbs | 1 quart |
| Lima Beans | 2 lbs | 1 quart |
| String Beans | 1 3/4 lbs | 1 quart |
| Baby Beets | 2 1/2 - 3 lbs | 1 quart |
| Corn on the Cob | 6-8 small ears | 1 quart |
| Greens, Spinach etc. | 2 3/4 - 3 lbs | 1 quart |
| Peas, Green,Shelled | 4lbs | 1 quart |
| Tomatoes | 3 lbs | 1 quart |
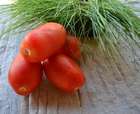
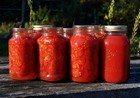
HOME CANNING TOMATOES USING THE OPEN KETTLE METHOD
Wash: Firm tomatoes
Dip tomatoes in boiling water 4-6 at a time. As soon as the skins are loose remove the tomatoes. Put them in cold water. Core and peel. Cut into pieces if desired. Place them in an open kettle or big pot. Season them with salt. (1 teaspoon salt to 4 cups tomatoes). Bring them very slowly to the boiling point. Stir them frequently to keep them sticking to the bottom. Cook for 1/2 hour. Fill hot sterilized jars, with scalded rubber seals in place. Wipe seals free of seeds an juice. Seal the jars at once with sterilized lids.
HOME CANNING TIMETABLE FOR CANNING VEGETABLES
When instructions are given to season vegetables allow 1 teaspoon salt to each quart of vegetables, or 1/2 teaspoon salt to each pint of vegetables.
| VEGETABLES | Preparation for Steaming in a Pressure Cooker | Processing Time using Pressure Cooker |
|---|---|---|
| Asparagus | Wash, scrape and tie asparagus in bunches, or cut into inch pieces. Drop 1 quart at a time into boiling water. Keep tips above water. Boil 5 minutes. Pack at once in hot jars. Add boiling liquid to within 1/2 inch of the top. Season*. Seal. Process at once for: | 40 minutes at 10 pounds for quart jars 35 minutes at 10 pounds for pint jars |
| Beans, Lima | Wash, shell, precook for 3 minutes. Pack loosely to within 1 inch of the top in clean hot jars. Add boiling liquid to within 1 inch of the top. Season*. Seal, Process at once for: | 60 minutes at 10 pounds pressure for quart
jars 55 minutes at 10 pounds pressure for pint jars |
| Beans, String | Wash and string beans. Drop 1 quart at at time into boiling water to cover. When water is again boiling, pack at once loosely into hot jars. Add boiling liquid to within 1/2 inch of the top. Season*. Seal. Process at once for: | 45 minutes at 10 pounds pressure for quart
jars 40 minutes at 10 pounds pressure for pint jars |
| Beets, young | Level 1 inch of the root and stem, Precook for 3 minutes. Pack at once loosely into hot jars. Add boiling liquid to within 1/2 inch of the top. Season*. Seal. Process at once for: | 40 minutes at 10 pounds pressure for quart
jars 35 minutes at 10 pounds pressure for pint jars |
| Broccoli, Brussels Sprouts, Cabbage, Cauliflower | Wash, remove course leaves and stems.Precook for 3 minutes.Pack at once into hot jars. Fill jars with fresh boiling water to within 1/2 inch of the top. Season*. Seal. Process at once for: | 40 minutes at 10 pounds pressure for quart
jars 40 minutes at 10 pounds pressure for pint jars |
| Carrots, young | Wash, precook for 5 minutes. Skins, slice or leave whole. Pack at once into hot jars. Add boiling liquid to within 1 inch of the top. Season*. Seal. Process at once for: | 40 minutes at 10 pounds pressure for quart
jars 35 minutes at 10 pounds pressure for pint jars |
| Corn, Whole Kernel | Cut from the cob as closely as possible. Do not scrape cobs. Weigh. Add half as much boiling water by weight. Heat to boiling point. Pack at once into hot jars. Add boiling liquid to within 1 inch of the top. Season*. Seal. Process at once for: | 75 minutes at 10 pounds pressure for quart
jars 65 minutes at 10 pounds pressure for pint jars |
| Corn, Cream Style | Cut from the cob with a shallow cut. Scrape cob with the back of a knife. Follow the rules for Whole Kernel Process at once for: | 75 minutes at 15 pounds pressure for quart
jars 65 minutes at 10 pounds pressure for pint jars |
| Corn, On the cob | Drop ears into boiling water. Precook for 5 minutes. Pack at once into hot jars. Add boiling liquid to within 1 inch of the top. Season*. Seal. Process at once for: | 80 minutes at 10 pounds pressure for quart
jars 80 minutes at 10 pounds pressure for pint jars |
| Mushrooms | Wash thoroughly. Peel mature mushrooms. Drop into boiling water containing 1 tablespoon of white vinegar and 1 teaspoon salt per quart. Drain. Pack at once into hot jars. Cover with fresh boiling water to within 1/2 inch of the top. Season*. Seal. Process at once for: | 35 minutes at 10 pounds pressure for quart
jars 25 minutes at 10 pounds pressure for pint jars |
| Okra | Wash thoroughly. Remove stem end. Precook for 3-7 minutes, depending on age. Pack at once into hot jars. Add boiling liquid to within 1/2 inch of the top. Season*. Seal. Process at once for: | 40 minutes at 10 pounds pressure for quart
jars 35 minutes at 10 pounds pressure for pint jar |
| Peas | Shell peas, and precook for 3 minutes. Pack loosely at once into hot jars. Add boiling liquid to within 1 inch of the top. Season*. Seal. Process at once for: | 60 minutes at 10 pounds pressure for quart
jars 50 minutes at 10 pounds pressure for pint jars |
| Potatoes, new, white | Wash, precook for 5 minutes. Skin, remove eyes. Pack at once into hot jars. Add boiling liquid to within 1/2 inch of the top. Season*. Seal. Process at once for: | 70 minutes at 15 pounds pressure for quart
jars 70 minutes at 15 pounds pressure for pint jars |
| Spinach, Greens | Wash thoroughly. Steam in small quantities until thoroughly wilted. Pack at once into hot jars. (See canning of vegetables above). Add boiling liquid to within 1/2 inch of the top. Season*. Seal. Process at once for: | 65 minutes at 15 pounds pressure for quart
jars 60 minutes at 15 pounds pressure for pint jars |
| Tomatoes | Scald, dip in cold water, skin. Pack at once into hot jars while hot, whole or in pieces. Cover with boiling tomato juice to within 1/2 inch of the top. Season*. Seal. Process at once for: | 45 minutes in an Oven Heated to
275ºF. 25 minutes for processing in a Hot Water Bath. |
Home Canning Meat
The only safe way to home can meat is to use a pressure cooker. The next best thing is to use an open kettle method, but I always use the pressure cooker. Pressure cooker canning allows your meat to be processed safely at 250° F which is possible to do when oven canning, but because you are using glass, such high temperatures can result in the glass exploding. Whereas in a pressure cooker this doesn't happen, and you know that the meat has been kept at high temperatures. In oven canning the meat will only be kept at boiling point (212 °F/100°C) even if you set your oven at 250°F.
Also, don't think that by adding salt to your meat you will be hedging your bets against spoilage. Use salt for taste only, and don't rely on this as a substitute for good home canning methods.
Did you find this page helpful?
Sharing is a way of saying, "Thanks!"
Follow Us and Keep Up to Date
Extra Resources for Home Canning
Go to Canning Tomatoes
Go to Canning Applesauce
Go to Canning Green Beans
Go to Home Canning Instructions
Go to More Canning Recipes
USDA Home Canning Basics
USDA Home Canning Selecting Fruit and Fruit Canning
USDA Home Canning Tomatoes
USDA Home Canning Vegetables
USDA Home Canning Meat, Fish, Seafood
USDA Home Canning Fermentated Foods and Pickling
USDA Home Canning Jams and Jellies
Watch some Instructional Videos on Home Canning Tomatoes
More Food Videos at 5min.com
More Learn to Cook at 5min.com
BEST SELLING HOME CANNING BOOKS, HOME CANNING KITS AND EQUIPMENT AND CANNING LABELS.
You can Add your Comments or Tips for Home Canning!
We have lots of pages where you can contribute to throughout this homesteading website. We love hearing from our readers, and hope you will be one of those we hear from too. Look around our homesteading website. If you have some Comments or Tips for Home Canning of your own, please submit them. All you need to do is type and submit. We will do the rest!
Leave a Comment
Do you have anything that you would like to add after reading this page? We would love to hear your thoughts. If you can add additional information to what has been written here you will be adding value to the website! No need to have any special skills - just type and submit. We will do the rest!
Other Comments
Click below to see comments from other visitors to this page...
Meat Table Needed for Canning from 1930 Ball Book 
I have lost my meat table out of the 1930 ball book. Would you please help me out? I need a time table for oven canning meat. I would really like it to …
Updated USDA Canning Recommendations Not rated yet
Hi! I really love your site. Home canning is a very important skill to have in our self-sufficiency "tool kit."
As a WA State Master Food Preservationist, …
Don't miss out on our latest news and articles. Sign up for our free monthly e-zine!


OTHER SECTIONS OF INTEREST
 Canning Tomatoes
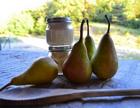
Canning Baby Food
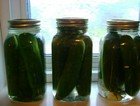
How to Make Pickles
 More
Canning Recipes
More
Canning Recipes
Preserving Food
New! Comments
Do you have something of value to add? Leave me a comment in the box below.