Composting Leaves for Leaf Mold with no Turning
Composting leaves for leaf mold can be done in 3 easy steps. Store your leaves for a season or two and use on your garden as mulch or as a soil conditioner.
I hate anything going to waste, especially when there is a perfectly good way of using it. We have Plane trees that lose all their leaves over autumn and you cannot believe just how many leaves you can get from one tree until they are blowing all around you and making the ground look undtidy.
As a result, fall is always a busy time in the garden. But instead of being mad about the falling leaves all the extra work they bring we should really be seeing our fall leaves as a blessing. It is a wonderful opportunity to take these leaves for mulching and composting.
In the past people have take their rubbish and burnt it, and this included the autumn leaves. However, we know now that not only does this practice cause air pollution, but it really prevents us from taking advantage of having potential free leaf mulch for the garden.
Composting leaves is easy, the only thing you need to be is patient. But the best thing is, unlike composting other vegetation, all you need to do is to wait for it to do its thing.
There is no turning to be done, and no need to fret as to whether you have the correct balance of materials.
 Rake
up your leaves, stuff them into large, plastic bin liners
and puncture them on the sides.
Rake
up your leaves, stuff them into large, plastic bin liners
and puncture them on the sides.
Then wet the contents well with a hosepipe before tying the bags up and leaving them in a hidden part of your garden.
Oak, alder and hornbeam will soon rot down, while sycamore, beech, horse chestnut and sweet chestnut take a little longer.
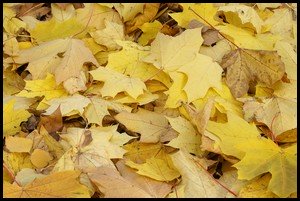
My Plane leaves waiting to be bagged and composted
Leave your bags until the following spring if you want mulch for your garden, or leave for another year if you want a fine tilth as a soil conditioner.
A Tip for Composting Leaves the Easy Way!
Stuffing piles of leaves into refuse bags can be a very frustrating experience if you have ever tried - especially if the wind is blowing at the same time while you are trying to keep the bag open while the other hand is trying to scoop the leaves in.
You can free up both hands if you take a cardboard box, cut off the flaps at either end so that you are just left with the sides. Place the cardboard box open inside the bag. This will then open the bag up and keep it open while you then shovel the leaves inside the bag.
Once inside the bag tie them up and flaten the top of the bag to form a depression or dished-shape area on the top. Now make some holes in the depressioned area. This is to allow rain to get into the bag and helps with composting leaves a lot quicker.
Make a few more holes on the sides of the bag to allow good bugs and bacteria to enter for the composting process to take place.
This way you don't have to remember to water them on a regular basis, nature will do it for you.
Leave the bags for 12 months, after which you will have wonderful rich leaf mold and an excellent mulch.
Add to our Page on Composting Leaves for Leaf Mold
We have lots of pages where you can contribute to throughout this homesteading website. We love hearing from our readers, and hope you will be one of those we hear from too. Look around our homesteading website. If you have some more information to add to Composting Leaves for Leaf Mold, please submit them. All you need to do is type and submit. We will do the rest!
Leave a Comment
Do you have anything that you would like to add after reading this page? We would love to hear your thoughts. If you can add additional information to what has been written here you will be adding value to the website! No need to have any special skills - just type and submit. We will do the rest!
Don't miss out on our latest news and articles. Sign up for our free monthly e-zine!
Go from Composting Leaves for Leaf Mold back to Organic Vegetable GardeningGo to How to Make Compost
Go to Making a Compost Bin
Go to Grow Vegetables
Go back to Countryfarm Lifestyles and Homesteading


OTHER SECTIONS OF INTEREST
 Organic
Vegetable Gardening
Organic
Vegetable Gardening Grow
Vegetables
Grow
Vegetables How to
Make Compost
How to
Make Compost Wooden
Compost Bin
Wooden
Compost Bin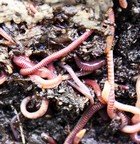 Worm
Farming
Worm
Farming
Organic Gardening
New! Comments
Do you have something of value to add? Leave me a comment in the box below.