Making Apple Cider in 5 Easy Steps
 Making apple cider is
one of fall's pleasures when you have a crop of
apples that you don't know what to do with.
Making apple cider is
one of fall's pleasures when you have a crop of
apples that you don't know what to do with. Let's face it, you can only can so many apples, make so many apple pies, jars of apple butter and eat only so many fresh apples.
You have the choice then of making either fresh apple juice or cider, or both, depending on your taste.
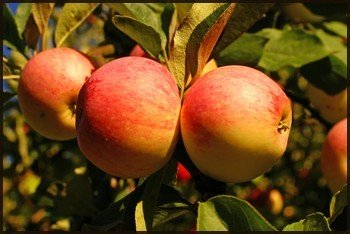
It does matter which variety of apples you use for apple cider making, and the trick is to try and use both sweet and sour varieties to get the right balance and taste.
As a result, many people use about 10% volume of crab apples to add the right amount of tart to their sweet eating apples. There are some varieties such as the Golden Russet apple that is also known as a cider apple as it makes excellent cider, but you can use any other varieties just as successfully.
One of the best heirloom varieties is the Red Streak apple. This is an English heirloom apple from Herefordshire that makes an excellent apple cider, and was considered, in times past, to be the apple to grow for this purpose. Unfortunately, over time, it was replaced by other, newer varieties, and there are very few of these apple trees left, although you can still find them in a few nurseries.
What Apples can you use for Apple Cider?
This is a table showing very old heirloom apples that were used in making apple cider generations ago. Some of these varieties are still available today. You really just have to find yourself a good nursery that specializes in heirloom fruit.| Acid - Sub Acid | Sub-Acid to Mild | Aromatic - Spicy | Astringent | Neutral |
| Rome Beauty | Baldwin | McIntosh | Crab Apple Varieties and Wild Seedling varieties | Ben Davis |
| Northwestern Greening | Northern Spy | Golden Delicious | Black Ben | |
| Duchess | Winesap | Roxbury Russet | Stark | |
| Yellow Transparent | Rhode Island Greening | Winter Banana | Gano | |
| Alexander | Golden Russet | White Pearmain | ||
| Wolf River | Wealthy | |||
| Red Astrachan | Wagener | |||
| Maiden Blush | Johnathan | |||
| Hubbardston King | ||||
| Grimes Golden | ||||
| Canada Red |
A good cider can be made either by pressing the sub-acid to mild or aromatic - spicy apples on their own, or by blending these two classes together.
You cannot make good cider by pressing either the sub-acid to mild apples or the astringent apples on their own. However, by adding 5% of the astringent apples to either the sub-acid to mild apples or the aromatic - spicy apples you will come up with another good apple cider blend.
None of the apples in the neutral category will make good apple cider on their own, however, if they are mixed with the category 1 apples making up 25% of the total, then you will have a pleasantly tart cider.
Those apples in the astringent category are the apples that you absolutely need in your cider to give it the taste you are after. These are all high in tannin and flavor, but crab apples should be used wisely and in small quantities so as to end up with the right balance to your apple cider.
Quality of your Apples affects the Quality of your Cider
 You will find that many people will make apple
cider from windfall
apples. However, the quality of your apples definitely affects your
final product. Ideally, the apples will be:
You will find that many people will make apple
cider from windfall
apples. However, the quality of your apples definitely affects your
final product. Ideally, the apples will be:ripe, as these have the higher concentrations of sugar in them needed for fermentation. They will also be more flavorsome and have a great smell.
not rotten, or partially rotten. Using rotten fruit will add bad bacteria and molds to your apple cider which you really don't want, or need. This will cause your cider to spoil very quickly or end up with something that is far inferior to what you could have made from good apples. In fact, your cider will end up tasting very "earthy" rather than the clean, crisp taste you are after.
Preparing your Apples for Making Apple Cider
Hopefully, you have made cider with apples that have been organically grown. However, if you have sprayed your apples, then you need to wash them in an acid bath to get rid of the residue spray. This can be done using hydrochloric acid.Take 100 gallons of water and mix in 6 quarts of hydrochloric acid in a thin stream, stirring quickly and constantly while adding it to the water.
While you are working with the acid, wear gloves and do this in an area that is well ventilated. Use a wooden container or a non-metal container for this process. Place your apples in the water and leave for 5 minutes.
Equipment needed for Making Apple Cider
You need a grinder or a chopper of some sort to cut the apples into smaller pieces. There are commercial grinders for this purpose. If you are only making apple cider on a small scale, then you can cut them up in a food processor.After that you will need a press to squeeze out all the juice, and bottles to put your cider in. Presses can be expensive and run to many thousands of dollars. You can, however, buy a water-bladder style press, for a fraction of the price, and works extremely well.
Better still, if you are the handy type, you can make your own press. Here are the free plans for a homemade cider press.
If you are processing small amounts of apples, then you can use a juice extractor.
Sterilization solution. If making organic cider is important to you, then you will want to buy Perasan A. This is an organic-approved sanitizer for cleaning all your equipment, including the bottles.
Cider Making Tips:
Don't let your apple juice come into contact with iron at any stage. It will cause your cider to go black when exposed to air.Cider will easily take on foreign flavors, so it is important to make sure that your equipment if thoroughly clean before you start, and any press cloths should be thoroughly boiled and cleaned before you start. Avoid using burlap.
Any storage vessels for your cider must also be thoroughly cleaned using scalded water.
How Many Apples Needed to Make Apple Cider?
You will need about 9 kg of apples to make about 5 liters of juice. You can make as much cider as you like, but you will just need to make sure that you have enough fermenting bins and bottles for storage.How to Make Apple Cider
How to Make Apple Cider: Method 1
This is a very straightforward recipe but has some drawbacks.
Firstly, you can't always trust that the wild yeasts will be successful, and secondly, cider made this way doesn't keep very long and has to be drunk quite quickly.
Some of you may be wondering why, of course, that should be a problem!
How to Make Apple Cider: Method 2
That is if you don't drink all the bottles before then!
Making Apple Cider: Step 1 - Pick your Apples and Leave
Making Apple Cider: Step 2 - Chop Apples
If you are really lucky, you will own crusher that will do the chopping for you. This consists of a stainless steel hopper with teeth at the bottom that will reduce your apples into pieces big enough for the press or juicer.
Whatever method you use to cut up your apples, if you have a lot of apples and there is a possibility that they will be standing long enough to turn brown before they are juiced, then submerge them in water to prevent this from happening.
div>
Making Apple Cider: Step 3 - Juice your Apples
Your juice should flow into a large, sterilized fermentation bin, preferably plastic or stainless steel. If you use any other metal the acid in the juice reacts very badly and you will have some nasty tasting juice and cider. So stick to stainless steel or plastic. Like wine making your equipment must be clean, so it is important to make sure that everything has been well sterilized before you begin.
Making Apple Cider: Step 4 Leave to Ferment
Making Apple Cider: Step 5
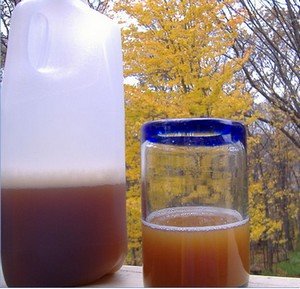
Decant
Decant
into sterilized bottles and leave for about 6
months before
drinking.Making Apple Cider from Store Bought Apple Juice
Making Apple Cider from Apple Juice: Step 1
Making Apple Cider from Apple Juice: Step 2 - Add the Yeast
Making Apple Cider from Apple Juice: Step 3 - Leave to Ferment
Making Apple Cider from Apple Juice:Step 4 - Rack and Add Sugar
Making Apple Cider from Apple Juice: Step 5 - Leave and Drink!
Leave them alone for about 3-6 months before drinking.VIDEO TO MAKE APPLE CIDER
1. Video Making Cider from Store-Bought Apple Juice
You can Add your Own Comments on Making Apple Cider!
We have lots of pages where you can contribute to throughout this website. We love hearing from our readers, and hope you will be one of those we hear from too. Feel free to tell us all about your own tips, advice or experiences on making apple cider.
Leave a Comment
Do you have anything that you would like to add after reading this page? We would love to hear your thoughts. If you can add additional information to what has been written here you will be adding value to the website! No need to have any special skills - just type and submit. We will do the rest!
Other Comments
Click below to see comments from other visitors to this page...
Cider making made simple - juice and strain method. 
I enjoyed your very good article.
One small point about juice extractors. The technology used by these machines has come on in leaps and bounds in …
Fermentation Time for Apple Cider Not rated yet
Hi,
Could you please advise me whether it is ok for the juice to sit for 6 weeks instead of 2-3 before bottling?
Would it be ruined?
Thanks,
…
Don't miss out on our latest news and articles. Sign up for our free monthly e-zine!
OTHER SECTIONS OF INTEREST
 Country
Recipes
Country
Recipes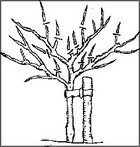 Planing
and Pruning Fruit Trees
Planing
and Pruning Fruit Trees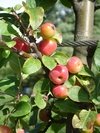 Dwarf
Fruit Trees
Dwarf
Fruit Trees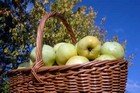
Growing Apple Trees

Self Sufficient Living
New! Comments
Do you have something of value to add? Leave me a comment in the box below.