How to Build a Patio and Fire Pit with Easy Instructions and Step-by-Step Images
Well, here we will show you how to create that perfect entertaining area where you can gather with your friends and enjoy their company in a hassle-free, cost-effective way. Below are simple DIY Patio and fire pit instructions that will show you just how easy it is to build a patio and a fire pit over a few days, or over one day if you are really energetic!
And don't forget to bring out the marshmellows to toast! If you want to, you can also put a cooking grate over the top and it then your fire pit becomes a BBQ.
An outdoor fire pit is very versatile, and think beyond the fact that firepits are just great for warming your toes during those cool autumn nights. They are also useful in burning up those prunings that you haven't been able to put through a chipper or were too big to put on the compost heap.
Outdoor Fire Pits and Instructions on How to Build a Patio
The first step on how to build a patio is to decide where you want to put your patio in your backyard and then go from the planning to the measuring stage. Take into consideration wind factors. You will want to build your patio and fire pit in a sheltered section of your garden, but away from trees as there is nothing worse having to sweep the patio decks constantly because of falling leaves.Also, having a roaring fire pit under hanging branches of any tree is a fire hazard.
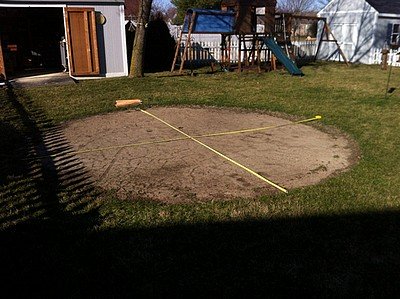
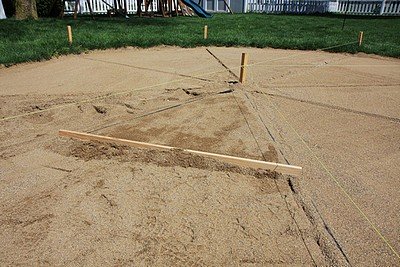
Measuring out the Patio Area
How to Build a Patio and Removing the Soil
Before digging, determine the amount of soil that has to be removed. We recommend that you remove about 10 - 12 inches of soil. Also, peg a wooden stake to the ground with some string and taking the string around in a circle, spray the grass as you measure out the circumference. Make sure that your paved patio will be wide enough for your furniture that you wish to place on top when you have finished.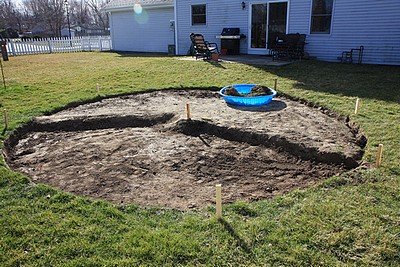
Digging out the soil for the new patio
How to Build a Patio by adding Crushed Stone and Coarse Sand

Placing crushed stone to the patio area
After spreading the crushed stone evenly, level the base. Check the levels with a spirit level.
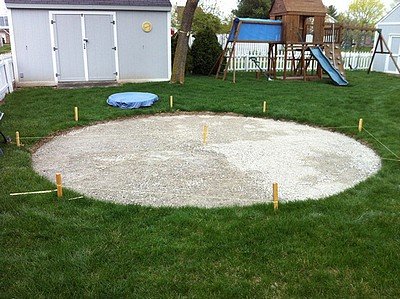
Checking the levels of the crushed stone.
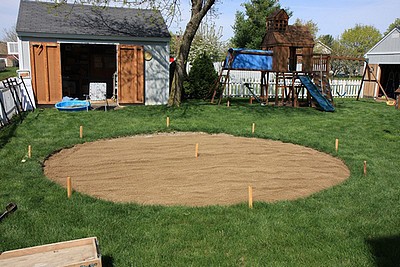
Adding coarse sand to the patio area.
How to Build Patio and Checking the Levels
Checking the levels to the sand again.
Ensure that you get the level of the sand right, as this will determine the final look of your patio.
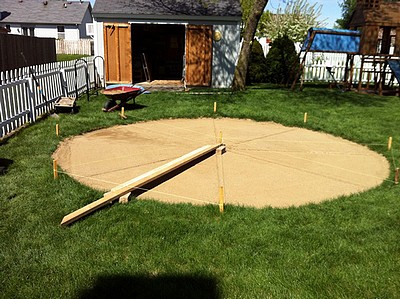
Giving your patio area a final level check.
How to Build a Patio and Laying the Pavers
You will be laying the larger pavers to outline your fire pit. Make sure that you make it big enough to be functional. A good size for an outdoor fire pit is 36-44 inches in diameter.
Around the larger pavers you will now be laying the smaller pavers that will make up your patio area.
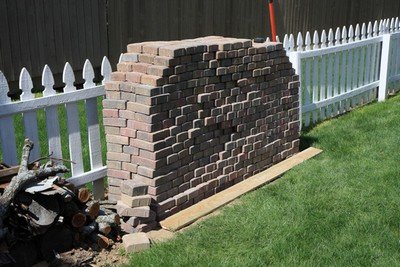
A stack of brick pavers for the new patio.
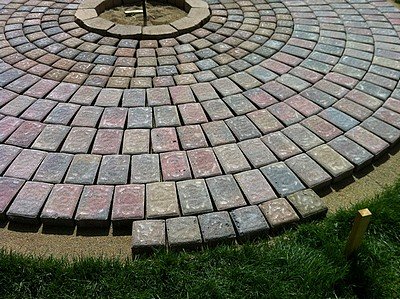
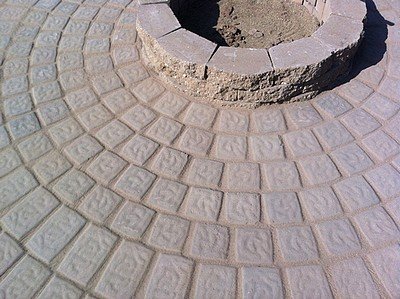
Pay attention to the direction in which the pavers are laid. It is better to divide your circle up in equal parts so that you can make sure that you are laying the bricks at equal spacings within each section.
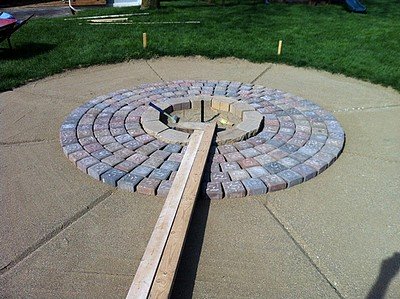
Laying the pavers out from the fire pit center.
How to Build a Patio and Check the Levels
Make sure to level all circles. You will need a rubber hammer to tap the pavers down and into position at times, as well as a piece of wood like the one below to make sure that the pavers are well spaced.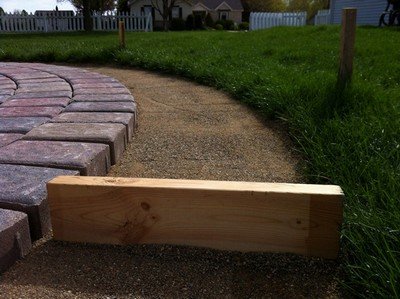
Ensuring pavers are well spaced.
Lay the last of the remaining patio pavers.
Laying the last row of patio pavers.
How to Build a Patio and Filling in the Gaps with Sand
Having laid all the stones, you will now need to brush some sand into the cracks to keep the stones in place.At this stage you can add cement to the sand and then putting a fine water spray onto the pavers. This will set the pavers in place. Don't be too harsh with the water as you don't want to end up washing this bonding material away. Or you can add polymeric sand later on. See instructions below.
Brushing pavers with sand.
How to Build a Patio and Finishing off the Fire Pit
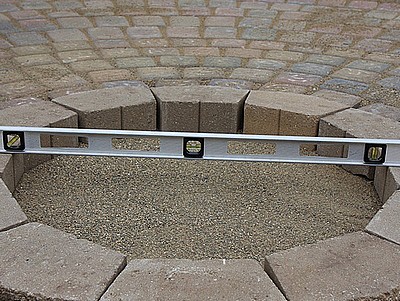
Making sure that the outdoor fire pit is level
Glue the fire pit blocks to each other using landscaping adhesive or cement. This keeps them in place. You can also, at this stage add a steel fire ring to the inside of your fire pits. By doing so you will protect your pavers from breaking down over time from the intense heat. However, the fire ring is optional.
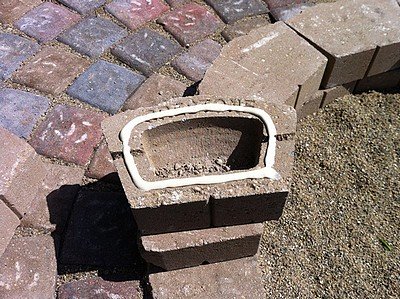
Glue the fire pit blocks together.
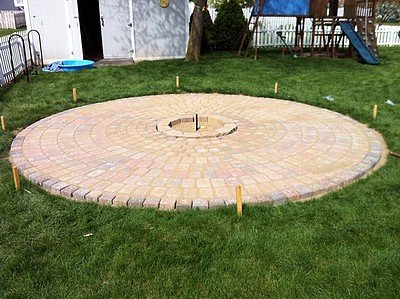
The fire pit is finished. Doesn't it look great?
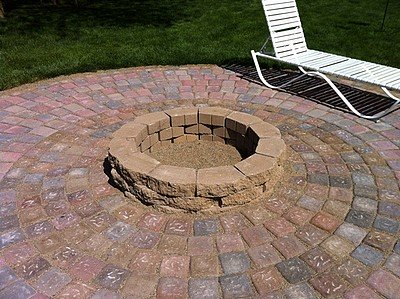
The finished fire pit and paved patio.
How to Build a Patio using Polymeric Sand
Sweep polymeric sand over your joints at least twice to ensure that there are no gaps that weeds could grow through. Make sure that there is no surface sand sitting on the top before you wet the area. Use a blower or a soft broom to get any residual sand off the pavers.
Spray the polymeric sand between the patio pavers using a fine mist spray, leave for 15 minutes and then mist again.
Although your sand will harden after 20 minutes in good weather, you will have to wait 24 hours before your sand has set completely.
Using polymeric sand on your fire pit and paved patio.
Adding some Stylish Outdoor Patio Furniture to your Patio
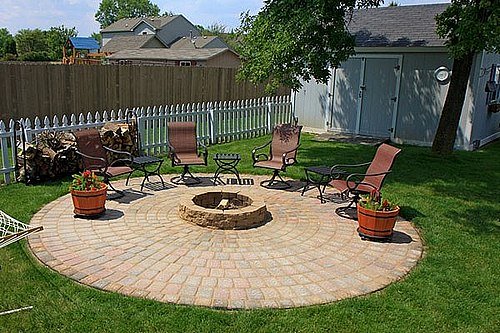
The final
product - One fire pit and patio with some stylish outdoor furniture
and some planted half wine barrels for a splash of color.

While choosing outdoor patio furniture for your brand new patio, take into consideration practical aspects such as durability, comfort and style. You can also easily customise your outdoor living area by adding a few stylish accessories.
So you can see, that without spending too much money, and within a day or two, you too could soon have your own backyard patios and outdoor fire pits by following these simple step-by-step instructions.
Now that you know how to build a patio and fire pit we look forward to seeing your own DIY patios here soon!
Image source
Do you have any DIY plans and ideas that you would like to share with us?
Leave a Comment
Do you have anything that you would like to add after reading this page? We would love to hear your thoughts. If you can add additional information to what has been written here you will be adding value to the website! No need to have any special skills - just type and submit. We will do the rest!
Don't miss out on our latest news and articles. Sign up for our free monthly e-zine!
Go from How to Build a Patio back to Do it Yourself ProjectsGo back to Countryfarm Lifestyles and Homesteading
NAVIGATION COLUMN
Find us on Google+Home
Page
Country Shopping
Country StoreFree Stuff
Free MagazinesHomesteading Blogs
Country Living Blog Gypsy's WanderingsCountry Living
Country Home Country Living Country Crafts Country Holidays Picnics CampingSelf-Sufficiency
Self-Sufficient Living Organic Gardening Do It Yourself Easy RecipesHomesteading
Homesteading Today Homesteading Q & A Homestead Animals Urban Homesteading Homestead DirectoryGoing Green
Green LivingFarms Around the World
South Africa United Kingdom United States Canada Central America Australia New Zealand Europe Farm Photos Farming Articles True Farming Stories Farms for Sale Organic Farm ProduceMiscellaneous
Guest Book Search Site Survey Advertise with Us [?] Subscribe To Countryfarm Lifestyles


OTHER SECTIONS OF INTEREST
 DIY
Projects
DIY
Projects Plans
for Farm Gates
Plans
for Farm Gates Porch
Swing Plans
Porch
Swing Plans Chicken
Coop Plans
Chicken
Coop Plans
New! Comments
Do you have something of value to add? Leave me a comment in the box below.