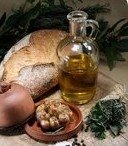
How to Make Cheese in 7 Basic Steps
How to make cheese in 7 basic steps with equipment that you can find in your kitchen at home. Cheese making is very satisfying. Just make sure that all cheese making equipment has been thoroughly sterilized before you use it as rogue bacteria will spoil your final product.
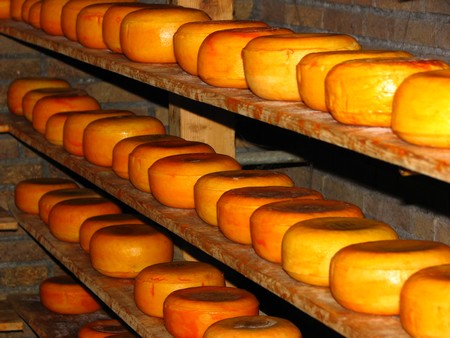

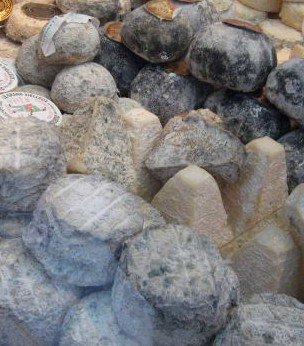
The 6 Main Types of Cheese
When you first start making cheese you will probably start off with a simple cottage cheese, as this is one of the easiest cheeses to make. However, despite using the same ingredients, there are 6 different main types of cheese.1. Hard: Parmesan
2. Semi-Soft Smooth: Port du Salut, Taleggio, Munster
3. Semi-Soft Crumbly: Blue veined Roquefort
4. Firm: Swiss, Cheddar
5. Soft and Ripened: Brie, Camembert,
6. Fresh and Soft: Cottage cheese, Cream Cheese, Mozzarella
Whatever cheese you make, other than fresh and soft cheese, all the others should stand at room temperature for 2 - 3 hours before serving as it tastes better than serving it cold from the fridge.
How to Make Cheese and What Milk to Use
If you are buying store-bought milk to make your cheese you will need to add calcium chloride back into the milk as the pasteurization process removes this from the milk. Adding calcium chloride into the milk will help firm up the curd. Having said that, I have made cheese quite successfully with store bought non-homogenized milk without adding any calcium chloride back.
Using UHT milk for cheese making is also never successful as the high heating process it goes through affects the whey proteins and your milk will not form curds.
When purchasing your milk for making homemade cheese, just make sure that it is fresh.
Rennet and Cultures for Making Cheese
Rennet is important for you milk to coagulate. You can get animal rennet that comes from the lining of livestock's stomachs, or you get vegetarian rennet that is made from certain plants.Either one will work well and comes in either tablet of liquid form from cheese suppliers. 3 drops of liquid rennet or 1/2 tablet rennet are usually diluted in a 1/4 cup of cool water.
See here if you are interested in making your own liquid rennet.
Cultures are either mesophilic or thermophilic. Yogurt is an example of a thermophilic culture, while buttermilk is an example of a mesophilic culture. You can either make your own cultures, or you can buy them from you local cheese supplier.
STEP 1: HOW TO MAKE CHEESE - EQUIPMENT
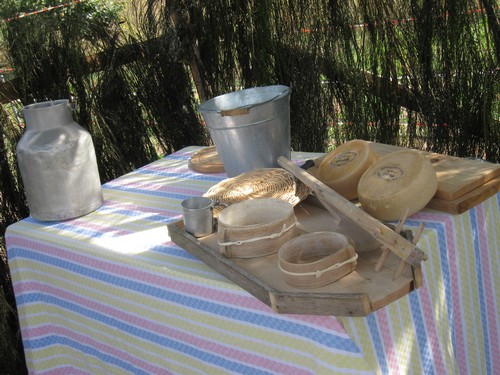
Traditional Cheese Making Equipment
You will also need a long-handled knife to cut the curds and a thermometer that can clamp onto the edge of the pot. This is important, because if you don't you will be measuring the heat of the pot itself, not the contents.
Finally, if you want your cheese to look fancy you can buy a cheese mold. However, I have made do with round stainless steel cutlery holders, which work just as well, or plastic bowls that have holes to allow the whey to drain off.
STEP 2: HOW TO MAKE CHEESE - BRING MILK TO ROOM TEMPERATURE
STEP 3: HOW TO MAKE CHEESE - HEAT THE MILK
STEP 4: HOW TO MAKE CHEESE - HOMEMADE STARTERS and COMMERCIAL STARTERS
These starters may be lemon juice, vinegar, buttermilk, yogurt, or dried cultures from cheese suppliers in the form of mesophilic or thermophilic cultures, each of which when added, will result in a different type of cheese.
Make your own Natural Cheese Starter
Method:
- Take about 1 quart of clean, new milk and place in a previously-scalded vessel and allow to stand in a clean area till it sours.
- If the temperature has been kept at from 70 to 75 Fahrenheit, souring will take place in about 24 hours.
- The top is skimmed off and thrown away, and the remainder well stirred into 2 or 3 gallons of separated milk, which has been previously heated to a temperature of 185 Fahrenheit, for 20 minutes, and then cooled to 75 or 80 Fahrenheit.
- This is again put aside for a further 24 hours, and it is stirred occasionally at first.
- By the next day the starter will be ready for use.
Sufficient starter should be added to each lot of separated milk to ensure its souring in from 20 to 24 hours. After being in use for some time a starter will need renewing, the length of time it will take to renew will depend on what sort of conditions it has been kept in.
If the homemade stater has been kept in clean conditions, the separated milk properly pasteurized, and the top always skimmed off and thrown away before using, it will last for a considerable time.
However, if the homemade stater is kept under less favourable conditions it will need to be replaced more regularly.
Always keep your starter covered with a piece of thin muslin to keep out dust, etc., without excluding the air.
A fresh lot of separated milk is inoculated each day with a little of the starter, and a continuous supply thus maintained for use.
When you add your starter, make sure that it is well stirred through the milk for even distribution. After that, leave the milk alone and don't touch it so that the coagulation process can take place.
STEP 5: HOW TO MAKE CHEESE - ADDING RENNET
Dilute your rennet as above, and when you add it to the milk, stir it thoroughly for even distribution. After the rennet has been added, the milk is again left undisturbed so that the curds can form.
STEP 6: HOW TO MAKE CHEESE - CLEAN BREAK & CUTTING THE CURD
So how do you know when your curd has reached that stage of a clean break? If you put your finger into the curd and pull upwards the curd should break away and whey should pool in the hole that has been left behind. If it doesn't, you will need to wait a little longer. Patience! ...
STEP 7: HOW TO MAKE CHEESE - CURDS & WHEY
 This part of the
process always reminds
me of Little Miss Muffet! However, I digress! Back to the job of cheese
making. What you want for making cheese is of course the curds.
However, never throw the liquid, called the whey, out.
This part of the
process always reminds
me of Little Miss Muffet! However, I digress! Back to the job of cheese
making. What you want for making cheese is of course the curds.
However, never throw the liquid, called the whey, out. Any excess whey can be fed to chickens and pigs on the homestead. More importantly, as a baker it is like manna from heaven. Substituting milk or water for whey in muffins, homemade bread, pancakes and cakes will result in an excellent finished product, light and moist; you will surprised at the results.
Place your butter muslin, or cheesecloth in a colander and with your slotted spoon, scoop the curds out of the pot and into the colander. Collect the whey at the bottom by placing your colander in another bowl. Leave it to drain like this until all excess whey has been removed.
HOW TO MAKE CHEESE - CONCLUSION
RECOMMENDED BOOKS ON HOW TO MAKE CHEESE
You can Add your Own Comments and Pages About Making Cheese!
We have lots of pages where you can contribute to throughout this homesteading website. We love hearing from our readers, and hope you will be one of those we hear from too. Look around our homesteading website. If you have any comments, recipes of your own, or questions, please add them by using this submission page below. We would love to have your contributions!
Leave a Comment
Do you have anything that you would like to add after reading this page? We would love to hear your thoughts. If you can add additional information to what has been written here you will be adding value to the website! No need to have any special skills - just type and submit. We will do the rest!
Other Comments
Click below to see comments from other visitors to this page...
Clear Directions at Last! Not rated yet
Thank you for clear, easy directions. I was confused about starter vs rennet. Luckily I buy raw cow's or goat milks for my cheeses!
**
You …
What is the ratio of buttermilk mes. starter and milk? Not rated yet
Does anyone know how much mesophylic starter I would use if I made frozen buttermilk mes. starter that are 1 oz. cubes?
I am using a recipe that calls …
raw milk, low pastuerized milk for cheese making Not rated yet
Finding raw milk isn't as hard as you might think. You can find raw milk by going online and putting in something like 'where can I find raw milk' or …
Don't miss out on our latest news and articles. Sign up for our free monthly e-zine!
NAVIGATION COLUMN
Find us on Google+Country Shopping
Country StoreFree Stuff
Free MagazinesHomesteading Blogs
Country Living Blog Gypsy's WanderingsCountry Living
Country HomeCountry Living Country Crafts Country Holidays Picnics CampingSelf-Sufficiency
Self-Sufficient Living Organic Gardening Do It YourselfEasy RecipesHomesteading
Homesteading Today Homesteading Q & A Homestead Animals Urban HomesteadingHomestead DirectoryGoing Green
Green LivingFarms Around the World
South Africa United Kingdom United States Canada Central America Australia New Zealand EuropeFarm PhotosFarming ArticlesTrue Farming StoriesFarms for SaleOrganic Farm ProduceMiscellaneous
Guest BookSearch SiteSurvey Advertise with Us


OTHER SECTIONS OF INTEREST

Cheese Making Recipes
 How to
Milk a Cow
How to
Milk a Cow How to
Make Butter
How to
Make Butter Making
Yogurt
Making
Yogurt Ice
Cream
Recipes
Ice
Cream
Recipes

Homemade Animal and Plant Rennet
Country Recipes
New! Comments
Do you have something of value to add? Leave me a comment in the box below.