Grow Vegetables Outside, Inside, in Containers, Vertically, All Year Round
Simple instructions on growing vegetables in your own backyard and tips on growing organic vegetables successfully when organic vegetable gardening.Organic Vegetable Gardening gives you health benefits and a source of great tasting vegetables. In no time at all you could be eating fresh produce that has been grown using natural pesticides, and natural fungicides will save you money in the process. To grow enough vegetables for your family doesn't take a lot of space, nor does it take a lot of expertise. What it does take is planning, time and effort, but the results are well worth it in the end. There is nothing more satisfying than eating a bowl of salad knowing that you have grown everything yourself. Perhaps too, you are thinking of becoming a vegetarian and are wanting a vegetarian diet.
Grow those old-fashioned varieties that are full of flavor and taste open-pollinated heirlooms seeds. They really are well worth growing and great for seed saving and sharing with your friends for generations to come.
For those of you who are trying to save money, you can do so by growing vegetables and growing herbs at home. Any excess produce can be canned, blanched and frozen or made into preserves, pickles and jams. Vegetable peelings and vegetable seedlings that have been removed to make room for others, can immediately be added to the compost heap to make sure that nothing is lost, and that everything is recycled where possible.
If you want to grow vegetables organically, and are not sure what the basic principles are for organic gardening and farming, have a look at our organic principles page and our article on Permaculture principles and garden design.
For those people who plant by the moon, they swear by it, feeling that as the tides are affected by the moon, so too are the plants and so therefore plant according to the phases of the moon. If you would like to know more about this visit our moon planting page for more detailed information. There are others too who like to plant their vegetables with others in order to complement each other or to have one plant work for the other in repelling insects or disease. This is known as companion planting.
Growing Vegetables and Choosing your Site Wisely
For those people who have limited space the best way to grow vegetables is by using the square foot gardening technique. This is an extremely economical way of growing vegetables and you can grow a surprisingly high number of vegetables in each square foot, you just need to know how many vegetables can be planted in each square foot. Square foot gardening is also a raised bed method for those of you who don't have good soil.
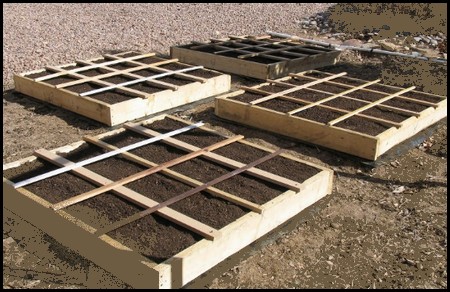
Square Foot Gardening
If you do have good soil, count yourself lucky. The ideal spot should be in a sunny location as vegetables need at least 6 hours of direct sunlight a day, and ideally it will be on a level piece of ground that has good drainage.
If you
have a sloping piece of ground, the only way you will be able to grow
your own vegetables here is by terracing that land. If you don't you
will have run-off when it rains which will wash seeds away downhill,
and you will find that some plants receive an excess of water, and
others hardly any at all.
Drainage is really important as vegetables do not like having 'wet feet'. And remember, if you don't have a large garden, you can always grow vegetables in containers or even grow herbs indoors.
For those of you who like to be different, how about growing the more unusual vegetables around, or some heirloom vegetables. And when planting winter vegetables you will be able to get second harvest.Growing Vegetables and the Size of your Vegetable Garden
Other considerations will be whether you can grow your vegetables year round with the water that you have available to you, the type of vegetables you want to grow and the amount of time you are willing to put into growing your own.
Having said that, 40 - 50 m2 is more than enough to sustain a family of five. This allows for space to grow vegetables that take up lots of ground such as pumpkins, melons and potatoes.
Growing Vegetables and Planting your Vegetable Garden
Because of this lack of planning, there are no vegetables of this type when you want it and you are forced to buy vegetables again at the supermarket. So make sure that you sow your seeds successively over a couple of weeks, to get your crop to mature over a sustained period of time, and to be able to collect the produce over a longer period.
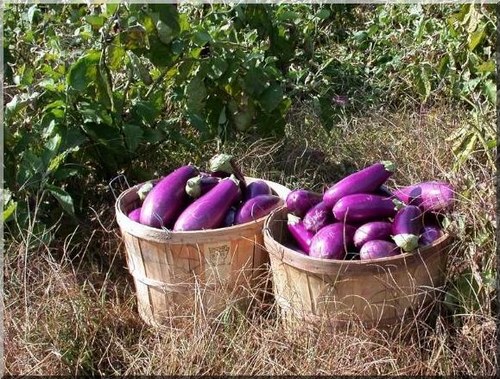
Take your family's tastes into consideration. There is no point in growing rows and rows of eggplants and then not be able to do anything with them because no one likes eating them.
10 Popular Vegetables to Plant
For the novice vegetable gardener here is a list of some of the most popular vegetables that many home growers plant:1) Beans
2) Carrots
3) Garlic
4) Onions
5) Peas
6) Peppers
7) Spinach
8) Sweetcorn
9) Tomatoes
10) Zucchini
So how many vegetables do I need to plant for my family?
Make sure that whatever you are planting is right for that particular time of year. Growing vegetables out of season can only be done using hothouses and cloches. If you don't have these facilities than stick to a plan to grow vegetables according to the right time of year. Therefore see our vegetable gardening calendar for when to plant vegetables for every month of the year.
Growing Vegetables and Crop Rotation
The four groups are as follows:
Group 1: Cabbages, cauliflowers, Chinese cabbages, broccoli, Brussels sprouts, onions, leeks and celery.
Group 2: Carrots, beetroot, parsnips, salsify, turnips, kohlrabi, sweet potatoes
Group 3: Tomatoes, potatoes, peppers, egg plants, lettuce, Swiss chard
Group 4: 'Snap' beans, Lima beans, broad beans, runner beans, French beans, Snake beans and peas.
So in year one you would have 4 different plots of vegetables and they would be Group 1, 2, 3 & 4
In year two you would now rotate your crops in the 4 plots. Replacing the groups as per year one as above, your planting would now be Group 4, 1, 2, 3 in its place.
In year three the rotation of crops would continue with the following groups of vegetables replacing those that were planted last year with Group 3, 4, 1, & 2.
Lastly, in year four the rotation of the crops would now be Groups 2, 3, 4, and 1.
In year five you would follow the same plan for year one.
In this way one has economized on the resources of the soil and produced healthier vegetables as you where you once planted the heavy feeding brassicas of cabbages etc. you now plant legumes which will put back nutrients into the soil and improve the condition of the soil. These are then replaced the following year by leafy vegetables and tubers which in turn are replaced by root vegetables.
Vegetables like cucumbers, pumpkins, gourds, melons, and other cucurbits haven't been included in any of the plots as they can be included anywhere in the crop rotation. Other miscellaneous vegetables such as okra, sweetcorn, radishes and endives can also be slipped into the rotation at any point without difficulty.
Growing Vegetables in Good Soil
Manure is almost a complete food for your vegetables as it contains good quantities of nitrogen, phosphorous and potassium and other trace elements that are vital for vegetable growing. If you have good soil, it is still important to enrich it with the peat moss, the vermiculite and the compost including manure as soil becomes depleted when used often, and nutrients need to be put back into the soil.
The addition of vermiculite allows the soil to retain air and water and to release nutrients to the plants when they need it. This results in faster and better growth for your vegetables.
You can also take the manure and make liquid manure known as a manure tea and apply it to your vegetables. Just remember though, be careful of using urine and liquid manures directly on your vegetables due to the possibility of pathogens. You can only do this is you are not going to harvest your vegetables for at least week and you have watered your vegetables several times after application of the liquid fertilizer.
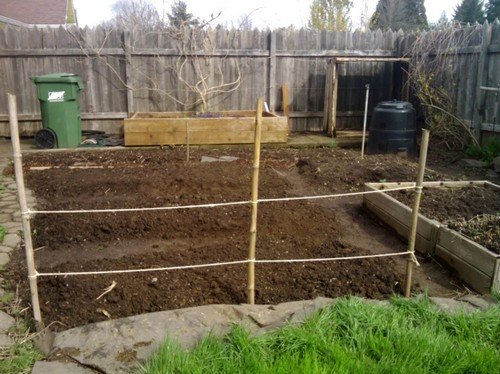
Growing Vegetables and Digging the Garden Beds
Your beds should never be wider than what you can safely weed from either side without having to step into the bed. You never want to do this as you will end up compacting the soil. Therefore your beds should be about 5 feet in width and about 20 feet long. The soil should be turned over systematically to a depth of about 9 - 12 inches. Obviously the deeper the depth the better for the plant, but usually 9 inches is enough.
You will notice when you have finished that the soil is a lot higher than when you first started. This is normal, and once you add your compost, manure, peat moss and vermiculite, you will add more depth to your bed. However, once the rain comes and natural erosion takes place, a lot of this height can be lost. Therefore, in order to maintain these definite beds you will either have to edge them with some treated wood, bricks or pavers. If you don't have these, you can make do by banking up the soil every now and again to define your beds.
To Dig or Not to Dig?
I know that some people reading this will have a counter-argument as to why it isn't good to dig the soil. The no-dig gardening method of planting vegetables has its advantages as does deep digging.
5 Reasons Not to Dig your Vegetable Gardens |
5 Reasons to Dig your Vegetable Gardens |
| 1. Not digging encourages soil-living creatures like worms to do the spadework for you. | 1. Digging breaks up heavily compacted soil, allowing it to breathe. |
| 2. Not digging reduces the loss of moisture. | 2. Digging kills surface weeds. |
| 3. Not digging protects the soil structure. | 3. Digging exposes pests to predators and the cold. |
| 4. Not digging prevents weed seeds being brought to the surface. | 4. If you don't dig you'll need a lot more mulch to grow potatoes as you will not be ''earthing up". |
| 5. Not digging is easier on the back. | 5. Digging is a good way to exercise for those who want it. |
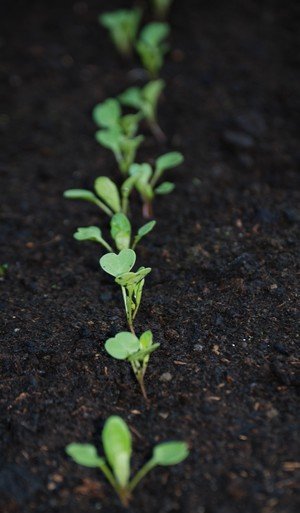
Growing Vegetables and Sowing, Planting Vegetable Seeds
Many of you may not want to grow vegetables from seed, but prefer buying seedlings. This is fine, as you don't have too long to wait before you see the rewards, but it is definitely more expensive.
Many vegetables like radishes, carrots and cucumbers, among others have to be planted as seeds in situ as you cannot transplant these types of vegetables. Others can be first grown by seed and transplanted very successfully. Therefore, when you vegetable growing, it is important to set some place aside where you will be able to raise your seedlings.
If you are going to farm or plant your own vegetables, you should know the different types of seeds there are as this will give you a better indication of what you are growing, especially for crop rotation.
For those wanting to know more on how to grow vegetables organically make sure that the seed that you have purchased has not been treated in any way. You will notice this immediately on opening up the packet if you are not sure as such seeds will be bright pink or red in color.
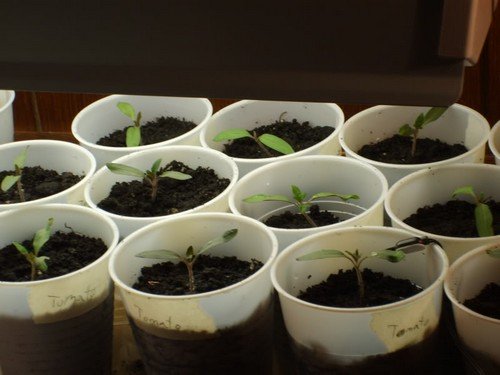
Find a good quality seed and prepare your seed boxes with a suitable growing medium. Even better still, learn how to save seeds when your harvest is finished, so that you are guaranteed of having heirloom seeds next time around.
Using top soil out of your garden is not suitable. Instead, rather buy commercial potting soil, or make your own with 1 part peat moss, 1 part vermiculite and 1 part compost. At this stage, manure should not be added as it may burn the seedlings.
Your seed boxes can be made either of wood, metal or plastic, as long as they have holes in the bottom for drainage and have been lined at the bottom with layers of crocks or small stones to a depth of about an inch. Fill the boxes to within a half inch to the top with soil and make sure that the soil has been firmed down flat with a firming board, or a plaster's wooden float etc.
When you grow vegetables from seed you don't want the seeds to be susceptible to any diseases found in the soil. Therefore, the next step is really important. You will need to boil hot water in a kettle and with the seed boxes standing level, pour the boiling water over all areas of the seedling box. Once the soil is completely cool, you are now ready to plant the seeds.
You will need to make little drills or rows in your seed box about 5 mm deep and about 35 mm apart. This can be done with the edge of a straight piece of wood being pressed into the soil at the correct depth and spacings. The seeds should now be placed carefully in the depressions making sure that you are not planting too many seeds per row.
Once you have finished, you will need to cover the drills with either some more sterilized soil, river sand or vermiculite. Firm it down lightly and water the seed bed with a fine spray making sure that the soil is well dampened. Initially place in a shady location. As the seedlings begin to emerge you can harden them off by exposing them to more and more sunlight before it is time to transplant them.
Make sure that you label each seed box clearly so that you know the type of vegetable, its cultivars and the date it was planted. Either keep the seed packet for the recommended spacings for optimal growth or make a note of this information for later when you will need this information when transplanting your seedlings out.
Growing Vegetables and Transplanting Vegetable Seedlings
 When you transplant your
seedlings, no
matter how careful you are, your plants will always suffer an element
of shock. Therefore, when transplanting your seedlings the aim should
be to minimize the shock as much as possible, because if you don't, you
could end up losing some of them.
When you transplant your
seedlings, no
matter how careful you are, your plants will always suffer an element
of shock. Therefore, when transplanting your seedlings the aim should
be to minimize the shock as much as possible, because if you don't, you
could end up losing some of them.
Most seedlings are ready to be transplanted when they are about 75 - 100 mm in heights and usually between 4 and 8 weeks old. That is unless you are transplanting onions and leeks as these will be 150-200 mm high before they are ready to be transplanted. Reduce watering your seedlings 10 days before transplanting.
I am not saying don't water them, what I am saying is just don't water them as much as you have been doing so in the past. If the weather is very hot, then your reduction of water should really be over 5 days. The last 2 days water should

be withheld completely. However, on the day that you are going to plant them out, you should water them thoroughly 6 - 12 hours before hand. Make sure that where you are going to transplant them to has also been well watered.
The best time to
transplant your
seedlings is late afternoon, early evening when the heat of the sun has
gone. This then allows your plants the night to re-establish themselves
before the next day. Choose your seedling wisely. Although you will be
tempted to plant them all out, only choose those that are strong, and
discard the others.
Lift your seedlings out of the seed box with a garden trowel and lay them at the recommended intervals given to you on the original seed packet. Dig a small hole and carefully place the seedling inside. Make sure that it's not too deep or that there is a space between the ends of roots and the bottom of the hole. Firm the seedling gently by pressing down around the stem. When you have finished, water the transplants well.
As a rule transplanting plants means that the leaves and roots are untouched. However, there are some plants that seem to benefit from having either their leaves cut or their roots cut, or sometimes even both. Onions and leeks can be trimmed both at the top and bottom without much ill effect. Beets and Swiss chard also get off to a better start if their leaves are trimmed slightly.
25 Vegetables you can Grow Indoors
People think of growing herbs and bulbs indoors, but few think about growing vegetables indoors. However, you can.
As long as your vegetables can get at least 9 hours of good light, not direct sunlight in
front of glass, as this will burn your plants, but 9 hours of good
light, and at least 7 hours of complete darkness, you will be
successful.
You will also need a room temperature of around 68
degrees F. At 32 degrees F. your plants will die. Because of the space
in your pots, and lack of depth for the roots, you need to buy the dwarf
varieties rather than the standards.
Also, make sure you have
space for spreading vegetables. Finally make sure that you have the
right pH in your soil for each vegetable.
1. Bush Beans
2. Beets
3. Brussels Sprouts
4. Cabbage
5. Chinese Cabbage
6. Carrots
7. Celery
8. Collards
9. Cucumbers
10. Eggplant
11. Kale
12. Kohlrabi
13. Leeks
14. Lettuce
15. Lima Beans
16. Mustard
17. Okra
18. Onions
19. Peas
20. Peppers
21. Radish
22. Squash (but will spread up to 20 foot!)
23. Shallots
24. Spinach
25. Tomatoes (Determinates only)
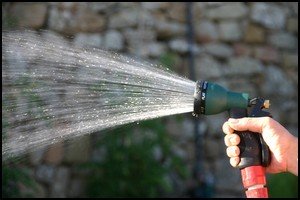
How much Water to Use when Growing Vegetables?
 As humans are made up
largely of water,
so are your vegetables. Therefore, when you grow vegetables, they will
benefit from regular watering. However, the major mistake that is
commonly made is that people tend to water too frequently and too
lightly.
As humans are made up
largely of water,
so are your vegetables. Therefore, when you grow vegetables, they will
benefit from regular watering. However, the major mistake that is
commonly made is that people tend to water too frequently and too
lightly. Crops need much more water in the hotter months and if you have hot, dry winds blowing you will need to water more regularly here too. Obviously when you have new seedlings, or you have newly transplanted seedlings you will need to water them every day. But when your plants are more established you will need to water them according to their type. Cabbages, spinach and lettuce tend to need lots of water because they need to grow quickly.
Root and tuber crops don't need as much water, although the soil should always remain moist, particularly when they are about to be harvested.
Make sure that your watering is never erratic as this can damage vegetables as much as over-watering them. As a guide, 25 mm of water every 4 days should be more than enough when your plants are well established. A light watering of a garden every day retards the development of a good root system.
To make the best use of your watering when you grow vegetables it should be done in the late afternoon so the plants can get the maximum benefit. With seed beds it is better to water these in the morning and allow them to dry out before the evening so as not to encourage dampening off and the dry soil discourages snails and slugs. Tomatoes and potatoes also benefit from morning watering if sprinklers are used rather than flood watering in order to reduce the chance of disease.
GROWING VEGETABLES AND CONTROLLING PESTS NATURALLY
 Growing organic
vegetables means that
you are not going to use either artificial fertilizers in the soil or
chemical pesticides and fungicides. There are a number of ways in which
we can control pests in the garden through biological methods. If you
read my article on gardening
with vinegar again natural methods have been
employed. Again, as mentioned before, companion planting can be used
very effectively to resist certain garden pests.
Growing organic
vegetables means that
you are not going to use either artificial fertilizers in the soil or
chemical pesticides and fungicides. There are a number of ways in which
we can control pests in the garden through biological methods. If you
read my article on gardening
with vinegar again natural methods have been
employed. Again, as mentioned before, companion planting can be used
very effectively to resist certain garden pests.By planting onions and carrots together you will avoid both carrot fly and onion fly. Aphids also hate basil, dill, mint and garlic, so if you plant these near plants that are susceptible to aphids, you won't have a problem. Slugs and snails are a vegetable grower's nightmare. However, if you take a large basin and sink it into the ground and then put an inch of beer on the bottom you will entice slugs and snails in their hordes. They fall into the beer-filled basin and will be there in the morning for you to dispose.
Here are some tried and tested recipes for getting rid of those pests in your vegetable gardens. One of the biggest problems, and certainly the most common, is having to fight off aphids. They are really pesky creatures that can destroy and kill your vegetables within days. Below is an excellent all-round, cheap and natural,organic pesticide that will quell those aphids in your garden.
Aphid Spray Recipe
1 whole head of garlic, minced1 cup of vegetable oil
Place the oil and minced garlic together in a glass bottle and seal tightly. Place it in a fridge for 3 days to steep. Strain after 3 days and replace the garlic oil in the jar. Refrigerate for further use.
For your aphid spray you will need the following:
1 tablespoon of your previously made garlic oil
1 teaspoon of washing-up liquid
1 liter of water
Mix altogether and place in a hand sprayer. Douse your vegetables with the liquid to get rid of aphids and white fly.
For more details and other recipes on how to control pests and insects organically see our page on Natural Pesticides.
| Countryfarm
Lifestyles Gardening Tip: Keep the birds out of your
vegetable garden by one of two methods, or both if you like! 1) Take some colored feathers, the larger the better, put them into an old apple or potato and place them on poles among your vegetables. 2) Place rubber snakes around the vegetable garden. Move them from time to time as birds are not as stupid as we think. |
THE REWARDS OF GROWING VEGETABLES AND FRUIT
Well, after following the above advice on how to grow vegetables you will no doubt in a short while be reaping the rewards of crisp, fresh, organically grown vegetables that are a cheap and healthy alternative for your family. If you want more specific information on individual vegetables or fruit we have the following resources:GROWING VEGETABLES:
- growing asparagus
- growing beetroot
- growing broad beans
- growing broccoli
- growing carrots
- growing cucumbers
- growing potatoes
- growing tomatoes
- growing rhubarb
- growing spaghetti squash
- how
to grow corn
MISCELLANEOUS:
Follow Us: Facebook, Twitter, Google+, Pinterest, RSS
 |
 |
 |
If you are looking for some more information see our page on the 10 best vegetable gardening tips we have for you.
Buy Vegetable Seeds and Gardening Equipment Online


Sometimes, after we have grown our vegetables there are often too many of them to eat quick enough. If this is the case, why not do some home canning or drink your vegetables by visiting our juicing vegetables page.
And if you are looking for some heirloom or organic vegetable seeds, bulbs or plants for your flower garden, or even some lovely herbs, visit our Online Country Store for more details.
We have both Organic Seeds, Wildflower Seeds and Heirlooms Seeds online for purchase.
WATCH THESE VIDEOS ON GROWING VEGETABLES
CHOOSING A SITE FOR YOUR VEGETABLE GARDEN
TESTING YOUR SOIL FOR A VEGETABLE GARDEN
SETTING OUT YOUR VEGETABLE GARDEN
CHOOSING WHAT TO PLANT IN YOUR VEGETABLE GARDEN
STARTING SEEDS FOR YOUR VEGETABLE GARDEN
PLANTING SEEDS IN SITU FOR YOUR VEGETABLE GARDEN
TRANSPLANTING SEEDLINGS IN YOUR VEGETABLE GARDEN
MULCHING YOUR VEGETABLE GARDEN
WATERING YOUR VEGETABLE GARDEN
USING ORGANIC COMPOST FOR YOUR VEGETABLE GARDEN
DEALING WITH GARDEN PESTS AND DISEASES IN YOUR VEGETABLE GARDEN
You can Add your Own Comments and Pages on Growing Vegetables!
We have lots of pages where you can contribute to throughout this homesteading website. We love hearing from our readers, and hope you will be one of those we hear from too. Feel free to write about your own experiences in growing vegetables here.
Leave a Comment
Do you have anything that you would like to add after reading this page? We would love to hear your thoughts. If you can add additional information to what has been written here you will be adding value to the website! No need to have any special skills - just type and submit. We will do the rest!
Don't
miss out on our latest news and articles. Sign up for our free monthly
e-zine!
Go to Growing Vegetables in Containers
Vertical Farming
Companion Planting for Vegetables
Organic Vegetable Gardening
No dig Gardening
Straw Bale Gardening for Vegetables
Second Harvest for Late Vegetables
When to Plant Vegetables
Go to Juicing Vegetables
Go to Self Sufficient Living
Go back to Countryfarm Lifestyles Home Page


OTHER SECTIONS OF INTEREST
Natural
Pesticides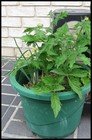 Growing
Vegetables in Containers
Growing
Vegetables in Containers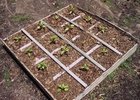 Square
Foot Gardening
Square
Foot Gardening Companion
Planting
Companion
Planting
Moon Planting

Organic Gardening
VEGGIE TIPS
- Only grow what you like eating.
-
Harvest everyday.
-
Plant seedlings interspersed with seeds of the same vegetable to extend the harvest time and to prevent a glut.
-
Plant more beans when the last lot flowers.
-
Grow tomatoes with basil and French marigolds as companion plants. The marigolds give off a substance that repels nematodes in tomatoes and similar plants.
New! Comments
Do you have something of value to add? Leave me a comment in the box below.